The Voracious Resurgence | |
| Prime Weapons • Ultimate Weapons • Ultimate Augments • Abjurations iL119 • JSE Necks • Divergence Augments • Escutcheons | |
| Reforged Armor Artifact: +1 • iL109 • iL119/+2/+3 Relic: +1/+2 • iL109 • iL119/+2/+3 Empyrean: +1/+2 • iL109 • iL119/+2/+3 |
Guides • Crafting • Trusts • Apex Monsters |
THA:CSMNG-Equipment4
|
Skill: +132~133 (588~589Total) |
For the Head, Body, Hands, and Legs slots, some people like to use Telchine pieces ![]() with Elemental Siphon +20~30. (
with Elemental Siphon +20~30. (![]() : MP+30~50; Snow-stone augment slot can't contribute to this ability.) With the May 10th, 2016 update[1], SE made skill more important than it used to be. Not only that, but as I have mentioned in the macro and Elemental Spirits sections, by using Skill here, you can double down and idle in it and get much faster buffs from your Light Spirit than you would had you spent the time getting Telchine pieces. So I recommend you follow suit and forgo the effort of Telchine augments. While it's not especially hard, the added inventory and less utility you'll get isn't as optimal in my opinion.
: MP+30~50; Snow-stone augment slot can't contribute to this ability.) With the May 10th, 2016 update[1], SE made skill more important than it used to be. Not only that, but as I have mentioned in the macro and Elemental Spirits sections, by using Skill here, you can double down and idle in it and get much faster buffs from your Light Spirit than you would had you spent the time getting Telchine pieces. So I recommend you follow suit and forgo the effort of Telchine augments. While it's not especially hard, the added inventory and less utility you'll get isn't as optimal in my opinion.
And with the new Baayami Set offering you ~30+ skill in each slot, a well augmented Telchine piece is replaced as soon as you hit 500+ Job Points.
Furthermore, seeing as how this should be netting you ~900MP (depending on the weather), it's not like you're gimping yourself by not using Telchine.
Just remember to match the day unless there's double weather, as Zodiac Ring brings the day bonus to 13%, but double weather gives a bonus of 25%. And if you can match them, then you'll be getting a +38% bonus.
You may be wondering why I have my refresh Moonshade and Beckoner's Horn +1
 , instead of larger skill pieces... because a constant stream of refresh helps you restore MP. (Plus it's only a possible 5 more skill... so... I'd rather have more refresh than ~5ish more MP restored. With 4/tic, two tics and you already have 3 more MP than that. Though you're likely just to have 1 tic happen while in this set when Siphoning. But even then, that's just 1MP less for a potential 3 MP more.)
And don't worry about trying to use Elemental Obis for this, as Elemental Siphon "auto-procs" day and weather bonuses similarly to SCH's Helix Spells.
And as you can see, this set is near identical to your Alexander Set, so any valid substitutions above for pieces from that set are the same here.
Cure Potency Set
|
|
Cure Potency: +50% |
What really matters here is the Cure Potency, as you're not main healing (except in very rare, very lax occasions)... everything else is just making your better than you are. Gone are the days of SMN being a WHM with a larger MP pool... and good riddance!
And as such, having capped casting time is useful... but it's not the life or death that it is on WHM/RDM/SCH. Our main curing power stems from our Avatars, especially so after the June 7, 2016 update[2] really cracked out the curing potential of Garuda, Carbuncle and Leviathan's curing BPs; and your support job cure spells should be just that: supportive.
So while you can, and many do, devote the inventory to a few more pieces for that last ~14% of "Fast Cast"... It's not really worthwhile IMO. Either you'll have a real WHM/SCH/RDM or you'll be using a Trust healer. So the demand for auxiliary heals to be of the caliber of main healer's heals... is kinda... unnecessary. And it's not like you'll be letting people die with the above. Remember. you're not there to keep people alive, you're there for the damage you can provide. The fact that you can pass out some heals on the side is no different than BLU's ability to do the same.
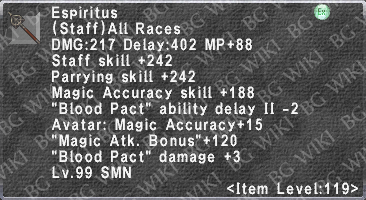
You may have noticed that I don't have anything in the ammo or staff slot (and that I keep that Ambuscade Cape on). The reason is very simple: Perp and Level. Your staff will help keep your perp cost down, and since you're using a Gridarvor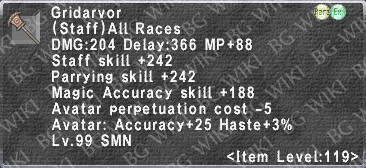 , it'll also come with that +95 accuracy boost. Furthermore, if you are planning to take on the dedicated effort to make a Nirvana, it's best to get into the habit of not changing your staff... as Nirvana's best two assets (+2 Levels and AM3) are lost when Nirvana isn't worn. And your ammo slot is what determines your Avatar's level... swapping it out for a non119 ammo... is literally deleveling your Avatar by 20 levels. So... don't do that.
But feel free to use a staff like Chatoyant Staff or Serenity
 (+30% potency -10% cast time with perfect augments) should you not be using a Nirvana. Serenity
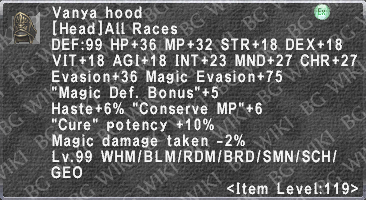
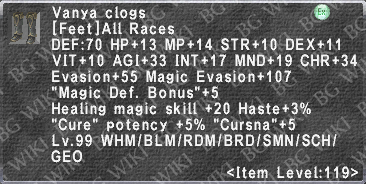
 even allows you to free up a massive amount of potency gear for more "Fast Cast" or "Cure" casting time down gear. Which then you can double down on pieces from your FC set above here too, or if you just want to burn all your inventory: Vanya pieces offer -7% cast time down via Path B augments. (Vanya also offers you +20 Healing magic skill for every Path B piece you use; which, after capping Cure Potency, is the best way to increase your cures' power.)
You may be curious as to why I don't use the FC and then a pure potency set... unless you're using a third party tool... cures are so fast now, it's possible to be in the wrong sets. So I say, just have it all in one. Cure Potency is really all that matters and it's easy enough to do with one set... and the less changes, the less possibility for the game to derp on you.
| |||||||||||||||||||||||||||||||||||||||||||||||||
|
|||||||||||||||||||||||||||||||||||||||||||||||||
MND: +168 |
Shattersoul Set
STR: +112
|
Garland of Bliss is pretty straight forward. It's magical, so it benefits the most from Magic Attack Bonus gear. And if you can only afford one Fenrir Ring +1 , Acumen Ring
 would suffice as an alternative for one of them. Furthermore, it's
 ![]()
![]() damage, so that Weatherspoon Ring
damage, so that Weatherspoon Ring you might have chosen for your Adoulin Ring is super good for it. And it's for that same reason that you'll want Weapon Skill Damage instead of MAB for your Ambuscade cape. (Since WSdmg is multiplicative with MAB, with 226 MAB and 10% WSdmg... that equates to the same as ~259 MAB. And with Weatherspoon in lieu of one of the Fenrir Ring +1
 , that equates to the same as ~290 MAB.) Also, while you may have heard that you'll want ΔINT for magical Weapon Skills... Garland of Bliss is one of the ones that works slightly different, being a ΔMND instead of INT, hence why you'll want that MND for your
 ![]() /
/![]() .
.
Shattersoul is also a simple ![]() WS. It doesn't have replicating ƒTP across all hits, so multi-attack effects are less effective than on the WSs that do. Weapon Skill Damage is the primary raw booster for it, which is in rather short supply for SMN. So the general +STR (for the boost to fSTR) and +INT (the statmod) will be what you want to stack as much as possible. More Tali'ah pieces can be used in lieu of the above, especially good if you have those in the interim of making the above.
WS. It doesn't have replicating ƒTP across all hits, so multi-attack effects are less effective than on the WSs that do. Weapon Skill Damage is the primary raw booster for it, which is in rather short supply for SMN. So the general +STR (for the boost to fSTR) and +INT (the statmod) will be what you want to stack as much as possible. More Tali'ah pieces can be used in lieu of the above, especially good if you have those in the interim of making the above.
Merlinic pieces all have the potential to beat the pieces above..... but.... damn if that is worth it. Not only will you have to take the time to get multiples of them, just for a single WS... but any piece you do get is much more worthwhile used as a BP piece or a nuking piece. Not to mention the terribad crapshoot that trying to get worthwhile augments on them... and since SMN isn't a frontline WS heavy job... I wouldn't waste the time or inventory just for the occasional WS use. However, with that in mind, compare and contrast your nuking Merlinic pieces to the above for Garland of Bliss; as that is a ![]() WS, it's quite possible for your nuking augments to eclipse the above pieces for that.
WS, it's quite possible for your nuking augments to eclipse the above pieces for that.
Finally, the ammo slot is off limits, as mentioned above: -20 levels is a bad thing. And, just in case you somehow didn't know, the grip and staff slots will prevent you from using the WS, as it resets your TP. And, personally, I like to use the Elemental Belts and Elemental Gorgets over other options... as while /SCH may get more of a use out of a Korin Obi or Hachirin-no-Obi
 for Garland of Bliss... the Fotias' 2% chance at a free WS is worth the trade off what other pieces offer. Not to mention that the +.2 ƒTP isn't nothing.
