The Voracious Resurgence | |
| Prime Weapons • Ultimate Weapons • Ultimate Augments • Abjurations iL119 • JSE Necks • Divergence Augments • Escutcheons | |
| Reforged Armor Artifact: +1 • iL109 • iL119/+2/+3 Relic: +1/+2 • iL109 • iL119/+2/+3 Empyrean: +1/+2 • iL109 • iL119/+2/+3 |
Guides • Crafting • Trusts • Apex Monsters |
Category:Ambuscade

|
Getting Started
Complete the Stepping into an Ambuscade Records of Eminence objective and speak with Gorpa-Masorpa in Mhaura at (G-9) for an explanation about Ambuscade.
- Players must have completed the First Step Forward Records of Eminence objective in order to undertake Stepping into an Ambuscade.
- Stepping into an Ambuscade can be set from the Tutorial section of the Records of Eminence menu under Basics:
- Quests → Objective List → Tutorial → Basics → Stepping into an Ambuscade
Be in possession of either the Ambuscade Primer Volume One or Volume Two Key Items.
- All party members must be in possession of one of these two Key Items.
Eligibility Requirements
In order to participate, players must satisfy the following:
- Complete either the Ambuscade Primer Volume One or Volume Two objectives in order to obtain the Key Item for the corresponding volume of the primer for the type of battle players wish to complete.
- Players may have only one of each of the Ambuscade Primer Key Items.
- Objective targets vary by month after a version update, opponents are rotated out, and generally not repeated.
- Players may have only one of each of the Ambuscade Primer Key Items.
- The Ambuscade Primer Volume One and Two objectives can be undertaken from the Ambuscade category of the Records of Eminence menu.
Entry and Progression

- Examine the Ambuscade Tome in Mhaura (G-9) and select the type and difficulty level you would like to attempt.
- Only the party leader may register the group.
- The party will be registered so long as the system detects that there are no issues with the layer area or registering party members.
- Players will be unable to register if:
- Any player is not in possession of an Amuscade Primer Volume One or Two Key Item.
- The number of registrants exceeds the maximum of fifty reservations.
- A party member already has a reservation.
- To cancel a reservation:
- A player may cancel their reservation via the ambuscade tome.
- Three minutes has passed from the time the player is notified that their instance is ready.
- The registrant boards a boat.
- The registrant leaves Mhaura in any way.
- To cancel a reservation:
- Players will be unable to register if:
- Adding new party members after registration will not cancel the registration, but the party may only enter with the number of players it registered with.
- A message will display for the party leader when entry is ready.
- As of the July 2016 update[3], automatic entering was added.
- The default setting is "off" and may be changed by having the party lead examine the Ambuscade Tome and selecting the Toggle auto-transport function.
- In line with this, having the auto-transport function off has a notification sound played when it is the party's turn.
- This may be disabled via the sound settings in the Config menu.
- As of the July 2016 update[3], automatic entering was added.
- Examine the ambuscade tome within three minutes to enter.
- The time limit for an Ambuscade is 30 minutes (Earth time).
- Between 1~6 players may participate.
- Trusts may be called after entering Maquette Abdhaljs-Legion.
- The number of alter egos that may be called forth will depend on the number of players initially registered.
- Player HP and MP will be restored to full and any status ailments they are suffering from will be removed upon entry.
- Trusts may be called after entering Maquette Abdhaljs-Legion.
- Key Items will only be lost upon victory.
- Meaning that should a player or group lose, they may reattempt the battlefield without having to reacquire new Key Items.
Upon victory, a special currencies known as Hallmarks and Badges of Gallantry, which may be exchanged for rewards, Experience/Limit Points, and Capacity points will be given to all players.
- Notorious Monsters inside Ambuscade do not drop any treasure directly.

Battle Information
A Word On Enmity
- Enmity functions abnormally in two ways.
- The mobs will go to a random player once someone aggros.
- After aggro everyone is on the hate list by default, so you can easily get hate with AOE enmity actions like Warcry and Valiance or self target enmity actions like Foil and Pflug.
Battle Type & Levels
There are two types of Ambuscades you may attempt. Entry into either is determined by which Key Item you possess.
|
| ||||||||||||||||||||||||||||||||||||||||||||||||||||||||||||||
An ![]() Abdhaljs Seal will triple the amount of hallmarks and gallantry you receive from a successful Ambuscade.
Abdhaljs Seal will triple the amount of hallmarks and gallantry you receive from a successful Ambuscade.
Intense Ambuscade (Vol. One)
| Volume 1, April 2025, Goblin | ||||||||||||||||||||||||||||||||||||||||||||||||||||||||||
|---|---|---|---|---|---|---|---|---|---|---|---|---|---|---|---|---|---|---|---|---|---|---|---|---|---|---|---|---|---|---|---|---|---|---|---|---|---|---|---|---|---|---|---|---|---|---|---|---|---|---|---|---|---|---|---|---|---|---|
Notes:
Furious Bozzetto Bomber
Baby Bomber
Bozzetto Ravager
Bozzetto Deathbringer
Bozzetto Incanter
Setups and Strategies:
Very Difficult:
DD, DD, Buffs: COR: Chaos and Samurai. BRD: March X2, Minuet, Madrigal. PUP: Sub WAR and use a standard Valoredge frame setup with strobe and flashbulb, optic fibers, repair kit, and other standard flare. The puppet is not in any danger ever. Master wears no pet oriented gear. Strategy: PUP sends the automaton after the Ravager (WAR) to hold it and start the fight. They then immediately provoke the Deathbringer (DRK) and separate it to remove the aura. I favored using a few counter pieces such as Mpaca body, Bathy Choker R15, and Cryptic earring over a offense oriented DT set. As the Deathbringer rapidly attacks with low damage club and you can counter them up as a PUP. The PUP shouldn't be in any danger of dying with Regen on as the Deathbringer has weak attacks. The rest of the party goes after the Don. Then the Incanter, which doesn't need to be slept as it just wakes up. Then the Ravager. Unless there are some unlucky stuns or paralyze procs then the PUP should be able to finish or nearly finish their Deathbringer. The WHM should stand out of range of AoE range of and to die from the Baby Bomber once or twice as the Don rapidly eats the floor. Keep reraise on and get back up. That's it. Simple month. Rinse and repeat. Lionheart RUN x2, COR/WAR, GEO/WHM, BRD/WHM, WHM or g Buffs: March x2, madrigal x2, Chaos/Sam. Fury/frailty on RUN 1, entrust frailty on RUN 2. 1) RUN 1 goes in and pull Don to starting corner, RUN 2 pulls Ravager to far left corner. COR provoke pulls Deathbringer to far right corner. BRD sleeps Incanter. WHM or RDM cast reraise, silence Don then position themselves in the middle of battle field, away from the other members. Geo entrust frailty on RUN 2 after everyone position themselves. 2) RUN 1 and RUN 2 use battuta and zerg Don and Ravager. COR holds Deathbringer, WS with Savage Blade and cures himself with sangine blade. BRD move between the battlefield and cast stona, paralyna and blindna on RUN 2 and COR. GEO baby sits RUN 1 with cures, blindna and paralyna. 3) If bomb kills WHM or RDM, they must get up immediately and cast Reraise or Goddess's Hymnus on them again. 4) After Don and Ravager is dead, RUNs kill Deathbringer next and Incanter last. Note: Clear time with setup above is about 4.5 min to 5 depending on buffs and support. RUN 2 can be replaced with a PLD, RUN 1 can be replaced with another DD using entrust Wilt, COR can be replaced with any DD with hate tool and PDT- set. DD, DD, Buffs: RDM: Haste II, Phalanx II, standard RDM stuff. COR: Crooked Cards Chaos Roll / Samurai Roll. BRD: Honor or Victory March / Minuet V / Minuet IV / Madrigal WHM: Barparalyzra / Barblizzara / Boost-Str / Regen IV-ga / Auspice Strategy: Bard can Lullaby the Incanter while the rest of the group murders the Don. Dispel from Finale or Dark Shot is a must to remove the Don's Ice Spikes. Silence on the Don can help reduce its threat during SP. With proper DPS output, a group can kill the Don before the Furious Bozzetto Bomber spawns. The White Mage should still stand away from the group in case you are not fast enough. Once the Don is dead, move on to the Incanter. If your Red Mage has properly controlled the Warrior and Dark Knights, they should still be bound. Incanter will melt. You can then choose either of the two remaining Goblins to gang up on. Once the third is dead, finish off the last one. If your Red Mage fails to Bind the first Goblin without aggroing everything, all is not lost. Do not panic. Bring the Goblins to whichever is Bound so the Red Mage can Bind the second one with its brother. You can then continue the strategy above without any issues.
TANK X2, BRD/WHM, WHM/BLM, DD X2 So long as the goblins are separated (removes aura), the tanks will hardly take damage when using -DT gear. Some Regen on the tanks before starting will but is not necessary (bring along Remedies, though). Each tank pulls the ravager and deathbringer to the wall near their respective spawning positions. The DDs should target the Don and provoke. WHM should ES Silence (although silence can land after ~3 attempts without ES). You may choose to not engage until the Don's spikes have been Finale'd but a good WHM (with helping BRD) should be able to keep paralyze off until the spikes are removed. This month seems to favor heavy-armor DDs but any well-geared pair of DDs should be able to take out the Don before silence wears off. WHM, BRD, and two DDs should form a square around the Don to prevent conal damage from hitting everyone. As soon as a bomber is spawned, WHM should be ready to Curaga IV (or higher). Solace, -DT gear, and SS all help. Once the Don is dead, the party should then take down each add (fights should be very straightforward hereon out). Tanks do not have to be PLD or RUN; in fact any DD with /RDM sub and phalanx on should be able to hold the two side goblins. Solo Red Mage Strategy for Difficult: As of the April 2023 version of this fight, it is completely soloable (with trusts) by Red Mage. Job: Red Mage / Ninja. This was done at Master Level 24. Weapons: Naegling / Thibron Trusts: Joachim, Ulmia, Monberaux (I did not pay him), Selh'teus, Qultada Buffs: Haste 2, Phalanx, En-Whatever-Day-It-Is, Aquaveil, Temper 2, Refresh 3, Barblizzard, Barparalyze, Stoneskin, Blink, Gain-STR, Protect/Shell V. I did not buff any of the trusts. Ate Grape Daifuku. After buffing, Spontaneity and Saboteur. Bind the rightmost Goblin from max distance. You should not aggro the others. If you do, it's fine, simply Bind the other Goblin and pull the Don away. Silence immediately, then Distract 3 and Dia 3. Press Savage Blade every time you have 1000+ TP. Position yourself within all of your trusts to soak the split damage from the Furious Bomber. Ideally Selh'teus will Rejuvenation, but you may need to help spot heal. You have 30 seconds between bombs to deal damage. The third bomb will be the Baby Bomber, just run away from it. Repeat the process, re-positioning after each Baby Bomber as needed. If Bind wears off the other Goblins, stop to re-apply. Once the Don is dead, pull whichever Goblin has the shorter remaining Bind duration and Dia 3, Distract 3, and kill it. Repeat with the final Goblin. This strategy requires that you be very well-geared. TP set consisted of Malignance and R30 Bunzi pieces. Savage Blade set consisted of R25 Nyame and Empyrean +3. Solo RDM/NIN strategy for all difficulties: You will need some "Enfeebling magic effect+" equipment for this strategy. This was tested to work with as little as +13% (Duelist's Torque +1, Uk'uxkaj Boots) on VE. 1. Buff and summon trusts, taking care to use trusts who will stay in range (to avoid death from the Furious Bomber). 2. Walk towards the right wall. Activate Saboteur. 3. Silence the Bozetto Deathbringer, while ensuring that you aggro the goblins. Let the goblins come all the way to the wall. 4. Activate Spontaneity. Cast Gravity II on both the Deathbringer and Ravager. 5. Begin making your way to the opposite corner of the arena by running along the left/back walls, bringing the Don (and Incanter on VD) with you to the corner. 6. Once you've reached the corner, Silence the Don (and Incanter on VD), then begin killing. If you were quick, you might still have Saboteur up to extend the Silence durations. By applying a heavy Gravity to the adds and running sufficiently far away, they will eventually (in 30-40 seconds) completely deaggro and return to their starting locations. Silencing the Deathbringer is required because he will not deaggro if he can still has the ability to cast on you, regardless of whether he's out of casting range. This may also work with Bind, but due to Bind's highly unreliable duration, Gravity is preferred. Once the Don and Incanter are dealt with, you can pick off the Deathbringer/Ravager individually at your leisure. Video of VD RDM/NIN solo by Lute (Japanese, but auto-generated subtitles work okay): https://www.youtube.com/watch?v=EB7vktWIq0s Key Item Suggestions:
| ||||||||||||||||||||||||||||||||||||||||||||||||||||||||||

Regular Ambuscade (Vol. Two)
| Volume 2, April 2025, Dragon | ||||||||||||||||||
|---|---|---|---|---|---|---|---|---|---|---|---|---|---|---|---|---|---|---|
Notes:
Setups and Strategies:
|
Previous Battles
Old battlefield information is stored on the Ambuscade Archive page.
Rewards
See Ambuscade Rewards for specific item and equipment rewards.
Hallmarks
Hallmarks are the primary currency of Ambuscade. They can be used to purchase items from Gorpa-Masorpa.
There are two types of rewards available. Those received in exchange for Hallmarks and those received for total amount of hallmarks accumulated.
- Hallmarks are not expended upon receiving items from the list of rewards for total amount of hallmarks accumulated.
- The types of items available vary with the content of that month’s Ambuscade.
- Your total number of hallmarks will reset back to 0 after each month's version update.
- Hallmarks and Badges of Gallantry are reset upon the next month's version update being implemented (usually set to happen from around the 3rd to the 10th of a month).[4]
Gallantry
Badges of Gallantry are the secondary currency of Ambuscade. They can be used to purchase items from Gorpa-Masorpa, and are only given to those who participate in Ambuscade with other players.
- Like Hallmarks, your Badges of Gallantry will reset back to 0 after each month's version update.
- Hallmarks and Badges of Gallantry are reset upon the next month's version update being implemented (usually set to happen from around the 3rd to the 10th of a month).[5]
Monthly Adventurer Campaigns
There is one type of campaign that may run any given month.
Ambuscade Point Bonus Campaign
- When this Monthly Adventurer Campaign is active, hallmarks and badges of gallantry will yield double the normal amount once per day when participating in each Ambuscade difficulty level.
- This bonus will reset at Japanese Midnight Earth time and stacks with the effects of Abdhaljs Seals to yield a total of four times the normal amount.
- Unclear on whether a mistranslation. Currently observed value with Campaign active and Seal used is 5 times the normal amount.
- As of July 2024, using a Seal during the Campaign stacks multiplicatively, resulting in 6 times the usual Gallantry.
- Unclear on whether a mistranslation. Currently observed value with Campaign active and Seal used is 5 times the normal amount.
- This bonus will reset at Japanese Midnight Earth time and stacks with the effects of Abdhaljs Seals to yield a total of four times the normal amount.
Ambuscade Gallantry Campaign
- When this Monthly Adventurer Campaign is active, the number of Badges of Gallantry earned from Normal and Intense Ambuscades will be doubled once per Earth day.
- This bonus will reset at Japanese Midnight Earth time and stacks with the effects of Abdhaljs Seals.
JSE Cape Augmentation
Job-specific Back equipment obtained with a ![]() Ambuscade Voucher: Back can be augmented by trading them along with certain items to Gorpa-Masorpa.
Ambuscade Voucher: Back can be augmented by trading them along with certain items to Gorpa-Masorpa.
- See the
 JSE capes page for augment information for the Job Specific Capes.
To augment a cape:
- Trade the item to Gorpa-Masorpa along with either an Abdhaljs Thread, Abdhaljs Dust, Abdhaljs Sap, Abdhaljs Dye or an Abdhaljs Resin.
- Select the desired attribute, and confirm your choice. After the initial trade, you can max out that path on your next trade if you also trade enough materials.
- Augments may be changed by repeating the above steps.
- Changing the augment path will not return any items used up to that point.
- However, when using an
 Abdhaljs Needle to change the augment, the current potency is maintained.
- However, when using an
- Further trading an augmented item with items corresponding to the attribute initially selected will increase the strength of the augmentation.
- For maximum strength augments the following are all required per cape:
 Abdhaljs Thread x20,
  Abdhaljs Dust x20,
  Abdhaljs Sap x10,
  Abdhaljs Dye x10,
  Abdhaljs Resin x5
Armor Upgrade
To upgrade Salvage Armor Variant Ambuscade Armor trade either the NQ or +1 variant and the requisite ![]() Abdhaljs Metals to Gorpa-Masorpa:
Abdhaljs Metals to Gorpa-Masorpa:
| Base Armor | Armor Piece +1 | Armor Piece +2 | Jobs | ||
|---|---|---|---|---|---|
| WAR / PLD / DRK / DRG | |||||
| MNK / NIN / SAM / PUP | |||||
| WHM / BRD / SMN | |||||
| THF / RNG / BST / COR / DNC / RUN | |||||
| BLM / RDM / BLU / SCH / GEO |
To upgrade Limbus and Nyzul Armor Variant Ambuscade Armor trade either the NQ or +1 variant and the requisite ![]() Abdhaljs Fibers to Gorpa-Masorpa:
Abdhaljs Fibers to Gorpa-Masorpa:
| Base Armor | Armor Piece +1 | Armor Piece +2 | Jobs | ||
|---|---|---|---|---|---|
| WAR / PLD / DRK / SAM / DRG | |||||
| BST / PUP / SMN | |||||
| MNK / THF / RNG / NIN / COR / DNC | |||||
| WHM / RDM / BRD / BLU / RUN | |||||
| BLM / SCH / GEO |
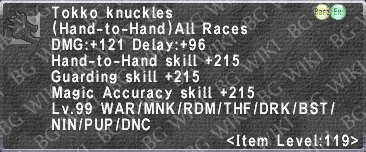
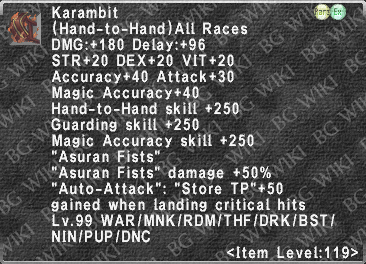
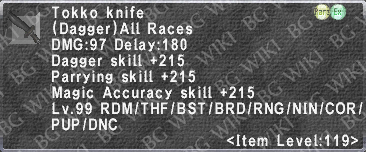
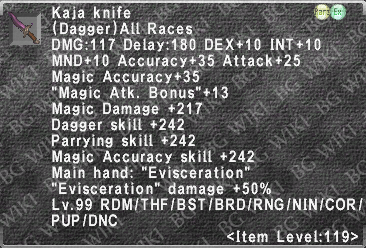
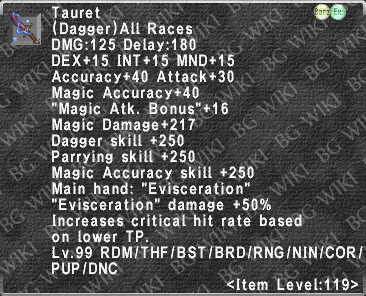
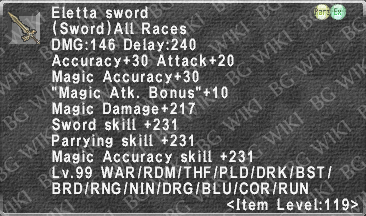
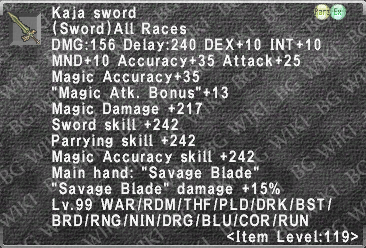
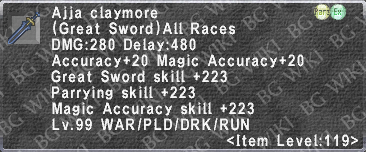
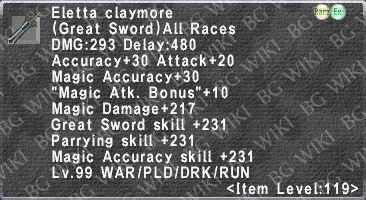
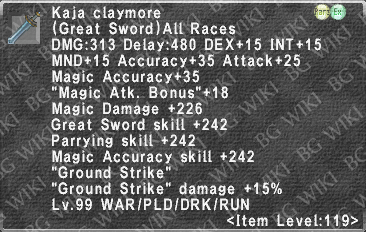
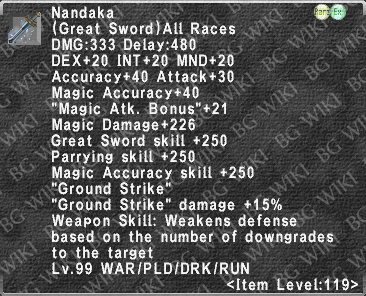
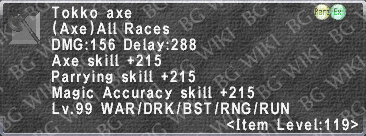
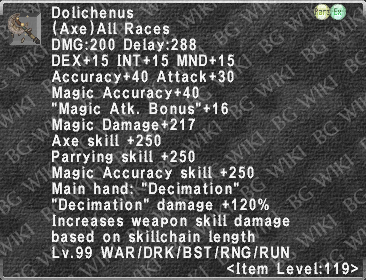
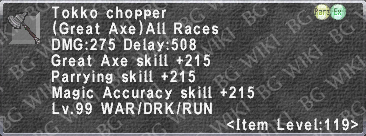
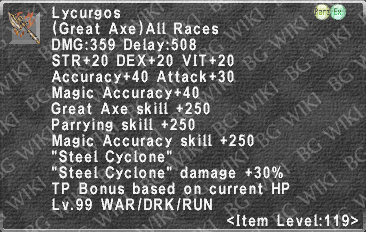
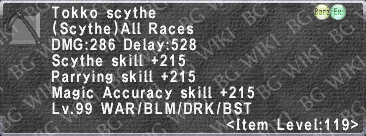
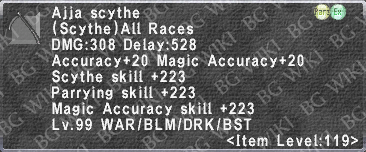
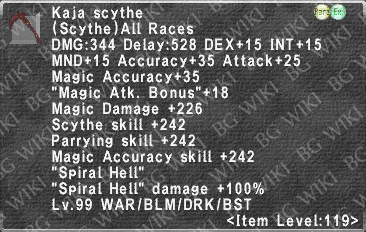
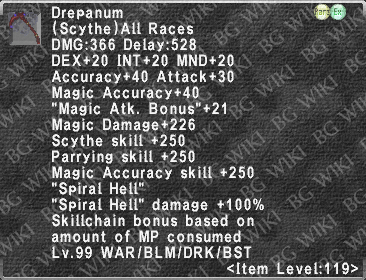
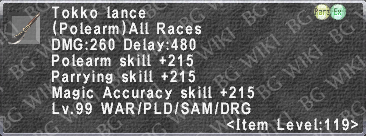
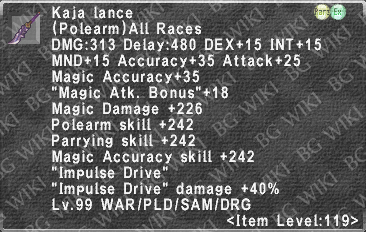
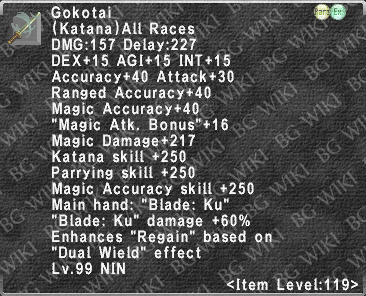
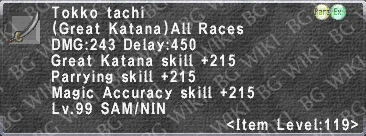
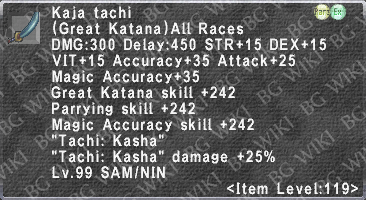
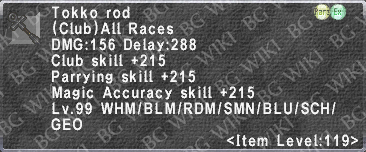
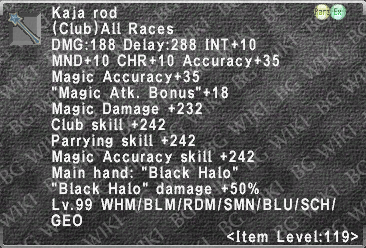
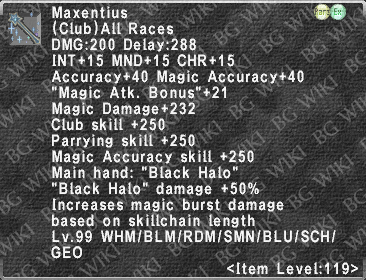
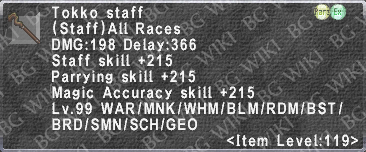
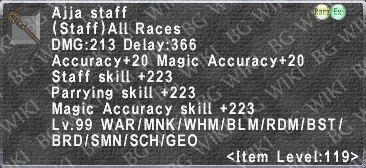
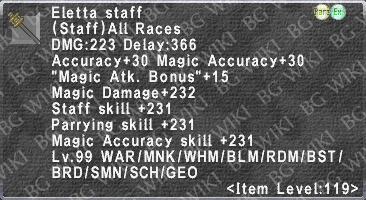
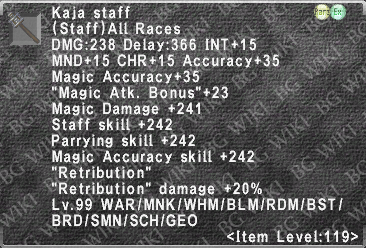
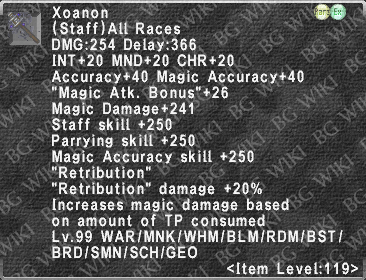
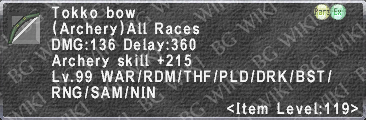
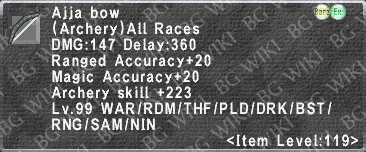
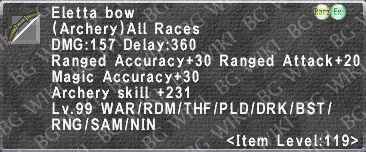
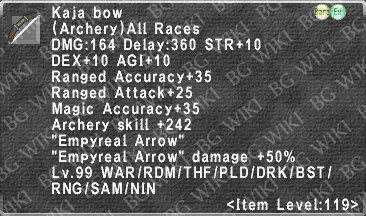
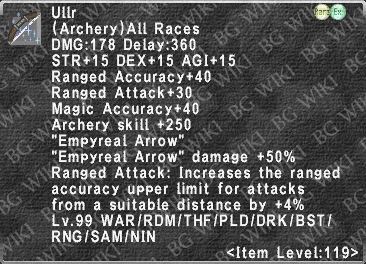
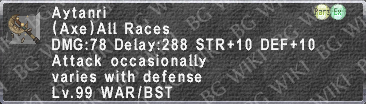
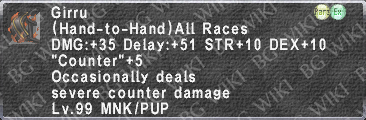
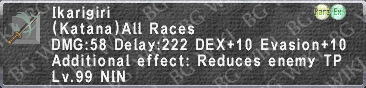
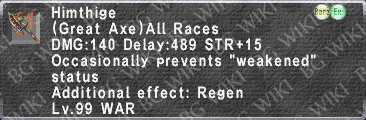
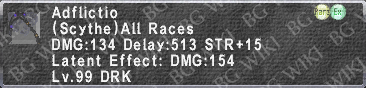
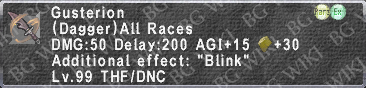
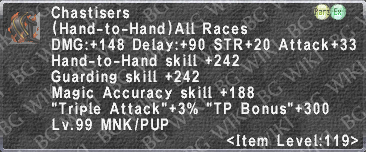
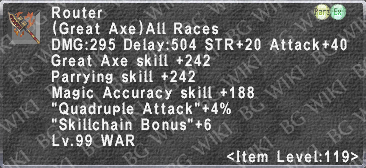
Ambuscade Weapons
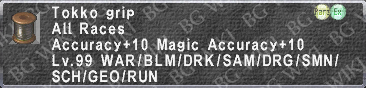
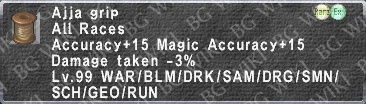
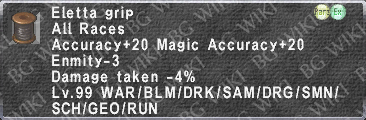
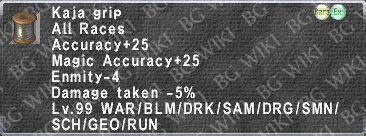
Speaking with Gorpa-Masorpa and listening to the message from Abdhaljs will allow you to exchange an ![]() Ambuscade Voucher: Weapon for a weapon of your choice or the grip.
Ambuscade Voucher: Weapon for a weapon of your choice or the grip.
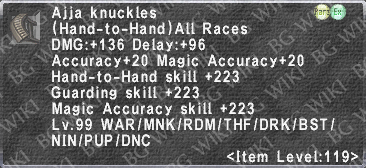
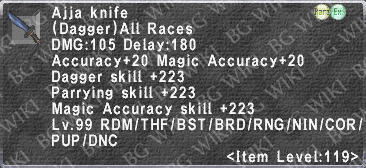
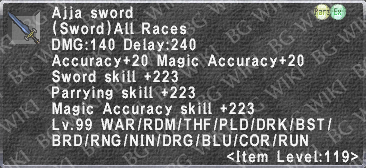
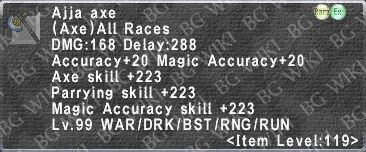
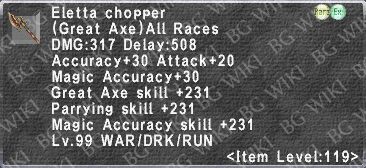
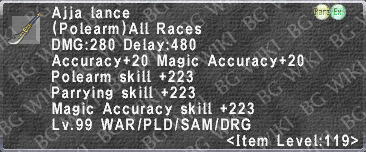
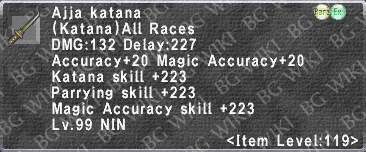
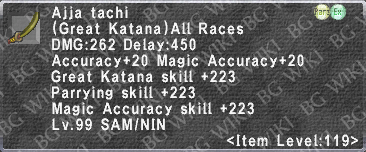
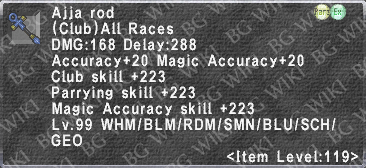
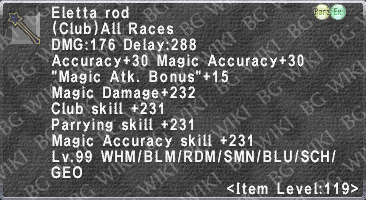
Each stage is then upgraded as follows:
![]() Abdhaljs Nugget x5 (1,500 Total Hallmarks / 4,500 Total Gallantry)
Abdhaljs Nugget x5 (1,500 Total Hallmarks / 4,500 Total Gallantry)
![]() Abdhaljs Gem x5 (2,500 Total Hallmarks / 7,500 Total Gallantry)
Abdhaljs Gem x5 (2,500 Total Hallmarks / 7,500 Total Gallantry)
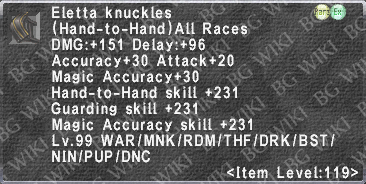
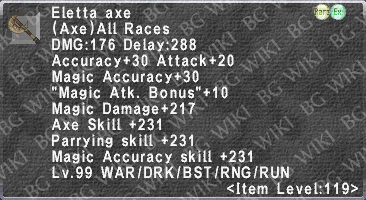
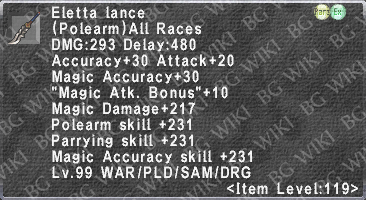
![]() Abdhaljs Anima x5 (4,000 Total Hallmarks / 12,000 Total Gallantry)
Abdhaljs Anima x5 (4,000 Total Hallmarks / 12,000 Total Gallantry)
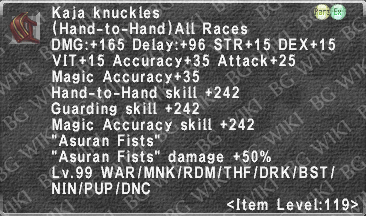
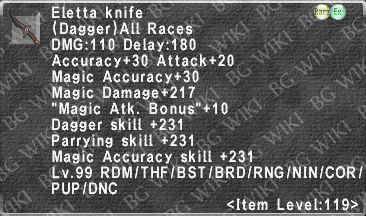
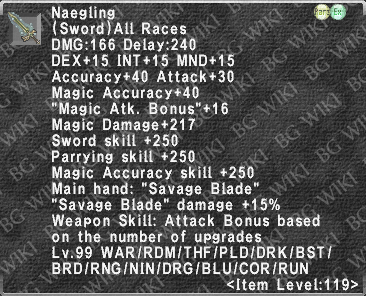
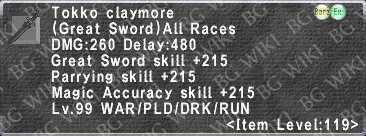
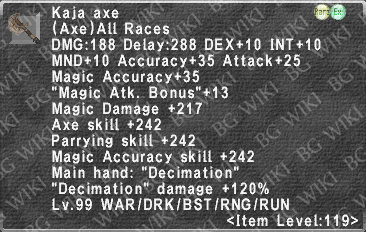
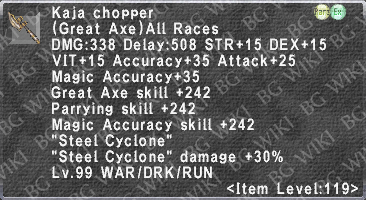
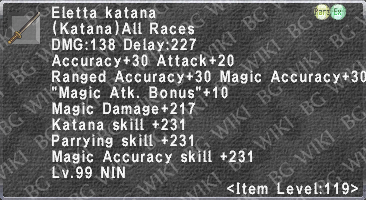
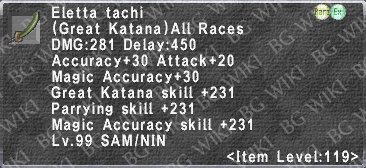
![]() Abdhaljs Matter x5 (6,000 Total Hallmarks / 18,000 Total Gallantry) and one of any non-Ambuscade Pulse Weapon‡
Abdhaljs Matter x5 (6,000 Total Hallmarks / 18,000 Total Gallantry) and one of any non-Ambuscade Pulse Weapon‡
- Any means literally any. The Pulse Weapon type does not have to match up with your desired Ambuscade Weapons. For example, one could use Ephemeron to create Gokotai.
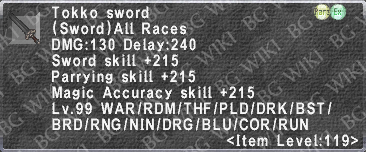
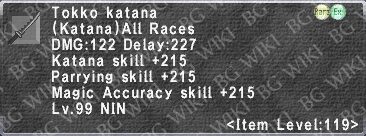
- For a single base Tokko to Final Form weapon, total required points: 14,000 Hallmarks or 42,000 Gallantry
- This does not include the cost of an
 Ambuscade Voucher: Weapon. As you may only get one per month for free from the Total Hallmarks Rewards List, additional vouchers may be purchased for an additional 1,000 Hallmarks or 6,000 Gallantry.
- This does not include the cost of an


| ‡ Eligible Pulse Weapons |
Source | Potpourri Category |
|---|---|---|
 |
Arch Dynamis Lord | None |
 |
Aello | Voidwatcher Goodness 2 |
 |
Qilin | Voidwatcher Goodness 2 |
 |
Uptala | Voidwatcher Goodness 2 |
 |
Ig-Alima | Voidwatcher Goodness 2 |
 |
Botulus Rex | Voidwatcher Goodness 2 |
 |
Bismarck | Voidwatcher Goodness 2 |
 |
Morta | Voidwatcher Goodness 2 |
 |
Paramount Gallu | Legion Clomper Goodness 2 |
 |
Paramount Botulus | Legion Clomper Goodness 2 |
 |
Svaha | Burrower Goodness 2 |
 |
Grannus | Burrower Goodness 2 |
 |
Samursk | Burrower Goodness 2 |
 |
Dreyruk | Burrower Goodness 2 |
 |
Silagilith | Burrower Goodness 2 |
 |
Urmahlullu | None |
 |
Fleetstalker | None |
 |
Shockmaw | None |
Pages in category "Ambuscade"
The following 27 pages are in this category, out of 27 total.
B
- Bozzetto Berserker
- Bozzetto Brawler
- Bozzetto Conjurer
- Bozzetto Crusader
- Bozzetto Devout
- Bozzetto Duelist
- Bozzetto Elementalist
- Bozzetto Erudite
- Bozzetto High Vicar
- Bozzetto Lancer
- Bozzetto Lyricist
- Bozzetto Moraingist
- Bozzetto Protector
- Bozzetto Pugilist
- Bozzetto Reaver
- Bozzetto Shinobi
- Bozzetto Stormbringer
- Bozzetto Swordsman
- Bozzetto Tamer
- Bozzetto Warlock
