The Voracious Resurgence | |
| Prime Weapons • Ultimate Weapons • Ultimate Augments • Abjurations iL119 • JSE Necks • Divergence Augments • Escutcheons | |
| Reforged Armor Artifact: +1 • iL109 • iL119/+2/+3 Relic: +1/+2 • iL109 • iL119/+2/+3 Empyrean: +1/+2 • iL109 • iL119/+2/+3 |
Guides • Crafting • Trusts • Apex Monsters |
New Player Leveling Guide
|
Level 0: Questions and Answers
FFXI is an enormous game. Twenty years of even slow growth adds up, and there's plenty of content to see. This guide aims to tell you about things you should do, with occasional mention of things you can do.
Fundamentally, FFXI is an old Everquest-style MMO. Do whatever you want. This guide's goal is to start with a brand new half-naked level 1 idiot with a big red question mark over your head and end with a fully-fledged level 99 idiot who has lost their question mark. Like an awful mobile game ad, but with more crystals.
Acquiring and Installing the Game
While FFXI does have a free trial, it's far more limited than the critically acclaimed FFXIV free trial.
You can play up to level 50, but:
- you can only enter areas in the base game
- you can't trade with other players (and can barely chat with them)
- and you can't start parties (though you can join them when invited by a paying player)
The full game goes on sale on SE's official store for $9.99 USD at least twice a year.
- That link is to the non-Steam version, because there's no real benefit to Steam integration and you can get additional issues from adding another launcher and set of servers to the mix. FFXI runs on ancient, decrepit PlayOnline and that's bad enough.
Once you've purchased the game, head over to the Install Guide to get it up and running.
Some Frequently Asked Questions
Q: Which server should I play on?
A: Asura has a reputation for being full of bots, gilsellers, mercenaries, and yell spam... because it has an approximately 50% greater active character population than the next two largest servers, Odin and Bahamut.
The Auction House usually has things in stock (though this isn't super important for a new player), and there may even be other actual human beings to help you with things! (And to get you a Gold World Pass)
While Asura's certainly not perfect, a judicious use of the player blacklist and chat-filtering tools can help mitigate some of its issues, the background advantages of a large population really can't be understated.
Q: Asura's too crowded for my taste. Where else should I go?
A: Bahamut and Odin are the other two popular servers, with about double or greater the population of everywhere else. There is a substantial amount of players who are making new characters on Bahamut, so if you are seeking other like-minded individuals, this may be a contender. Odin has a strong Japanese playerbase, but their English-speaking community isn't lacking either. Choose accordingly.
I've heard good things about Fenrir as far as the even-smaller servers go, but really at that point it's all a wash.
And of course, if you have a preexisting friend somewhere specific, go there. Should you regret your decision either way, there is a World Transfer service you can utilize for $18, or $9 during certain event periods.
Q: I heard about a guy who played FFXI for 18 hours straight and then puked and passed out and still didn't beat Pandemonium Warden. How much of this game can I get done if I'm a normal human being?
A: All of it. If you've got an hour a day to spend, you can accomplish almost anything in the game eventually. The infamous grind (which did exist) has been toned down, and the inflation in player power levels combined with marginally more considerate game design means that you can chip away at anything you truly want to do. Are there still grinds? Absolutely, but they're not mandatory.
Q: Is there anything else that the install guide didn't mention that I should do before I start the game for the first time?
A: With apologies for the very deliberate leading question, yes there is. There's a third-party launcher called Windower that's substantially better than playing vanilla FFXI even if you only use it for a few changes:
- The FFXIDB addon provides a highly useful minimap that can be used even in areas which you don't own the map for.
- The Findall addon is substantially better than vanilla item search.
- The MountMuzzle addon will silence the "riding on a mount" music, which is one track that never varies by zone, to let you hear FFXI's (excellent) regular zone background music instead.
- The Treasury plugin will automatically sort your inventory and discard anything on a user-configurable trashlist. It's vanilla autosort taken to the next level. You'll want it.
- For those on keyboard, the DelayMeNot plugin makes it far easier to use in-game macros.
If you are keen on customizing your UI:
- The Balloon addon will be enjoyed by players who want the NPC dialogues to appear in speech bubbles. It may greatly enhance your immersion in the narrative, compared to reading dialogues from a log window.
- The Nameplate addon allows customization of character nameplate and damage number. You can change the font and font size to your liking so that you may see things more clearly (and who doesn't like big damage numbers, right?).
- The XIVHotbar(for keyboard users) and XIVCrossbar(for controller users) addon essentially transform the play style to be more like an FFXIV one, where you no longer need to navigate through the ability menu or macro book to use your abilities. Note that this does require quite a lot of setup initially.
Beyond those, there are plenty more tools available in the Windower launcher. Take a poke around if you find yourself wanting to resolve a specific pain point.
Q: What job should I start with?
A: Honestly, it doesn't really matter. Every job starts at level 1 and you can switch jobs as often as you want without penalty in town. Scroll down a little bit to find more info about how each of the six starting jobs plays.
Personally, I'd say Thief or Warrior. Acquiring spell scrolls can be a real pain, and Warrior deals more damage than Monk early on.
But really, pick whatever calls to you! And if that means stopping at level 30 to do an unlock quest and being the only Dragoon left standing twenty years after FFXI's launch, more power to you.
Gold World Passes
Gold World Passes are invites created by existing players that let you create a character on a specific server. They were originally intended to guarantee that you get onto your server of choice (Asura!), but now the relevant part is the free stuff you can get.
After character creation, the new character can join a party with the inviting player and talk to the Gold World Pass NPC to immediately receive an Echad Ring, an infinite-use experience bonus. It's really good and only otherwise available during real-life-time-locked events. You definitely want one, and there's no sense having to have to wait, so get a Gold World Pass if you can!
After 40 real-life days, you can repeat this process to select from an extended list of items, including the Trizek Ring, an Echad Ring for level 99 Capacity Points that is similarly locked to specific real-life-time events.
At further milestones of 70/100/365 days, additional rewards can be claimed in the same way, which includes items like a Kupon W-Job (a free weapon) or a Kupon I-AF109 (level 99 equipment upgrade items).
Starting Jobs
Here's a brief overview of each of the six starting jobs! As mentioned in the Q&A, each is totally viable, and you can swap between any job at any time, so you can level as many as you like.
|
Job |
Description |
| Warrior |
WAR is a good all-rounder melee job, can hit hard and is fairly survivable. Can buff its attack by sacrificing defense, temporarily buff the group with Warcry and Blood Rage, and natively gets Double Attack, giving it a chance to attack twice per auto-attack swing. It's proficient with almost any weapon, but specializes in Two-Handed Great Axes and Sword. |
| Monk |
MNK is primarily offensively-oriented and more selfish compared Warrior, using Hand-to-Hand weapons and abilities like Impetus to dramatically increase damage and critical hit rate. It also gets some weird utility stuff like the ability to heal itself or attack at range, and eventually gets Kick Attacks! |
| White Mage |
WHM is the stereotypical healer, with tons of supportive and healing spells. While it does have some offensive spells with Dia, Banish, and Holy, overall it doesn't deal much damage, and may not be a great choice for a first job because of this. Mainly uses One-Handed Clubs or Two-Handed Staves. |
| Black Mage |
BLM is the stereotypical nuker, with tons of high-damage spells. Generally doesn't bring much else to the table beyond high-powered nukes, but hey, blowing stuff up is fun! Like WHM, it uses One-Handed Clubs early and transitions to Two-Handed Staves later. |
| Red Mage |
RDM is the jack of all trades job: it has decent melee capabilities and access to a range of both white and black magic. It has a lot of buffs and status effects, and can enchant its weapons to deal extra elemental damage with En-Spells. Can handle most any situation, but affording all those spells can be pricey. Mainly uses One-Handed Swords or Clubs. |
| Thief |
THF deals less damage over time than WAR or MNK, but specializes in burst damage with its positional-based Sneak Attack and Trick Attack, which each give a huge buff to damage when you position properly. Thief also has Treasure Hunter, which passively increases item drops from monsters - making it great for playing solo. Thieves mostly use Daggers or One-Handed Swords, and at later levels can Dual Wield them. |
Races and Nations
Pick any race you want for your character. It's been almost solely aesthetic since 2014, when SE reduced the (originally enormous) stat differences between races. With modern equipment, the tiny race stat differences aren't even noticeable.
- Should you regret your race choice, Square-Enix is planning to implement a paid
 Race change feature in the future like FFXIV's Fantasia or World of Warcraft's Race Change service. No date on that yet, though.
 - Alternatively, Windower addons like DressUp allow you to change your race at will, though this will only be visible on your end. Everyone else will see you as the race you initially chose.
Your starting nation doesn't lock you out of any content (you can change your nation allegiance later for a pittance of gil). However, it will be your home base for your first 20 levels and determines which storyline you start with - each nation has a different set of missions for the original game's main story which all converge for the "final" boss fight.
|
Nation |
Description |
| Bastok |
Vaguely Industrial Revolution, complete with smokestacks and soot and an underclass of manual laborer Galka whose culture is being systematically exterminated, right down to the Humes giving them new names that they can pronounce. Also, Cid lives here! |
| San d'Oria |
A city built by snooty, vaguely Catholic Elvaan with long names . If you've played FF14, they're basically a proto-Ishgard, though surrounded by forest rather than snow. Has a dumb yet honorable prince who is totally not going to end up married to his loyal knight who hides her scarred face. |
| Windurst |
Mithra and Tarutaru living mostly in harmony in and around a giant tree. Led by a prophetess that tells them how to summon magical superweapons to fight a living bird-woman god. Features FFXI's Dissidia rep, the bloodthirsty rhyming archmage Shantotto. |
Having Fun
If at any point you want to just go do stuff, go do it! Sure, it's easier to wait to get a mount, or cheap ways to cast Sneak and Invisible magic on yourself, or be higher level - the best three ways to avoid aggressive monsters - but there's something to be said for white-knuckled exploration. Walking somewhere like it's 2004 is always technically possible, even if teleportation is almost always faster. This guide will give both options for travel to most places early on. Later, if you want to walk, you'll have the toolkit to plan it out and make it happen.
Levels 1-5: Getting Started
| Goals: | ||||
|
|
|
|
|
First Steps Forward
After the opening cutscene, you will find yourself in a random spot somewhere in your chosen city.
Move with WASD / the left Analog stick. Hit R on the keyboard or L1 on controller when running to turn on autorun and continue running in the same direction. For the guide I'll be using Playstation's default button mappings when describing controllers, because ABXY isn't consistent between Microsoft/Nintendo controllers.
The default button to open the main menu is "-" (the minus key. Either the one next to 0 or the top-right one on the numpad works) or the Square button. There's a second page in the main menu if you use the left/right arrow keys to change pages.
This menu lets you do all kinds of stuff, including:
- trade with NPCs and other players
- show a map (typing "/map'" in the chat box and hitting enter also works)
- open your inventory (Ctrl-I also works)
- view and change your equipment (Ctrl-E also works)
- mess with your settings (the option for this is "Config")
- see random information that you need once every ten hours (like "Profile" and "Conquest")
The "Config" settings are mostly self-explanatory, aside from chat filters, which require some trial and error to get right. Some early recommendations for configuration settings are:
Autosorting stackable items in your inventory as you acquire them
- Config > Gameplay
- Autosort ON
Splitting the chat log into two windows and turning off that awful, slow, animation effect
- Windows > Shared
- Effect OFF
- Multiwindow Horizontal or Vertical as preferred
- Window 1/2 Adjust Width to fit your screen
Segregating messages by window
- Log > Window 1/2
- Select ON to display in the associated window, and OFF to filter from it
Font color adjustment
- Font colors
Fast Travel - Home Points and Survival Guides
Once you're good with movement and you've messed with settings to your heart's content, open your map ("/map" in chat, or "Map" in the - menu) and find the nearest blinking blue crystal, which is a Home Point:

These blue beauties allow you to set your character's home point (which is where you return when you die or use Warp) and also let you teleport to any other HP that you've previously touched.
- This currently costs you 1,000 gil, so there's no shame in going places on foot instead.
- Teleporting to another HP in the same city is free, so teleport around your home city at will.
- Now that you've used that Home Point, it won't blink on the map anymore. That's how you can tell whether you've already touched one!
The Home Point page on this wiki has a list of every home point, and you should keep it (or this guide) open whenever you go to a new area for a while. Always make it your first priority to hit a Home Point when you arrive somewhere new, because you don't want to leave and have to make that trip all over again.
Similarly, and equally visible on the map, there are floating books called Survival Guides:

These have the same ability to teleport you to each other, so you want to interact with them the instant you find them.
They usually come paired with another book, like a Grounds Tome or Hunt Registry, so be sure you’ve actually touched the Survival Guide.
Destrier Beret and Chocobo Shirt

So you redeemed all your codes, including a promise of the Destrier Beret and Chocobo Shirt when purchasing the Ultimate Collection Seekers Edition. These two items are a huge benefit for your character so long as you're on a job that is below level 31. Your items won't be directly added to your inventory or anything like that. Instead, you'll have to make your way over to a Festive Moogle in your town's port zone to collect your treasure. You should always be wearing this equipment so long as their latent effect is active!
Records of Eminence - The First Step Forward
Once you've gotten comfortable with running around, maybe talked to some NPCs, possibly traded (use the - menu and select "Trade" once you have targeted them) the appropriate NPC your Adventurer Coupon for a measly 50 gil, it's time to start playing in earnest.
Open your menu, go to the second page, select "Quests", and go to the full list of "Records of Eminence". These are small quests with surprisingly big rewards added relatively late in FFXI's life. Since they were added so late, they're hidden away here, but they're a big deal. You will have done a lot of them by the time you're level 99.
To start, pick "Objective List → Tutorial → Basics", then select "First Step Forward" to activate it. These NPCs will be marked on the map, and you will receive a chat notification stating it would behoove you to speak to the NPC when you first zone into the area they reside in. Complete the objective by talking to the Records of Eminence NPC in your starting city.
- You'll be heading back to this friend for new gear while leveling and once weekly to get lots of gil, so keep them in the back of your mind.
Note that most RoEs don't track progress unless they are activated. This means you should be sure to activate whatever you want to complete first.
- One exception: there are limited-time objectives that rotate three times a day like "kill vermin" or "gain experience points". These automatically activate themselves and don't count against your 30-active-RoEs limit.
- Second exception: Milestone-related objectives, such as reaching a specific level on a job or completing a certain Mission, will complete themselves as soon as you undertake them should you already have met the requirements.
- If you're going to complete an objective, make sure to activate it first!
Now that you have completed your first objective, you have unlocked access to a plethora of new ones. Get used to this system, because it is going to be a primary source of income throughout your adventure to 99, as well as a fantastic source of passive Experience Points. The sheer number of objectives can be overwhelming, and you can have 30 active at one time. Here are some recommended objectives to flag before you continue on outside:
- Tutorial > Basics
- Heal Without Using Magic
- Vanquish One Enemy
- Call Forth an Alter Ego (we will address this once you are level 5)
- Undertake a FoV Training Regime
- Assist Channel
- Combat (Wide Area) > General
- Vanquish Multiple Enemies I
- Deal 10-20 damage
- Total Damage I
- Total Damage Taken I
- Weapon Skills I
- Combat (Wide Area) > Spoils I
- Spoils (x Crystal) (flag all of them!)
- Combat (Wide Area) > Spoils II
- This will depend on which starting city you chose. If you picked San d'Oria, select objectives such as:
- Spoils (Flint Stone)
- Spoils (Rabbit Hide)
- Spoils (Bat Wing)
- If you picked Bastok, select objectives such as:
- Spoils (Honey)
- Spoils (Sheepskin)
- Spoils (Lizard Tail)
- If you picked Windurst, select objectives such as:
- Spoils (Rabbit Hide)
- Spoils (Honey)
- Spoils (Flint Stone)
- This will depend on which starting city you chose. If you picked San d'Oria, select objectives such as:
As you complete objectives, you may unlock access to new ones, or higher tiers of previously completed objectives. Always keep an eye out for new objectives to flag.
Going Outside
Finally, it's time to leave town! As you attempt to walk out the gate, a Tutorial NPC will stop you and give you a quest line that provides fairly average rewards. The first quest in this series is to obtain Signet. Near each town exit you should see a Conquest Overseer NPC, identified by having "W.W", "T.K", or "I.M" in their name. Speak to them and ask to receive the Signet effect. You should always be sure you have this buff active when leveling in Conquest areas.
Signet gives you a currency called Conquest Points when you kill monsters. Once you have 5000 CP (which you can check in the - menu under Region Info -> Conquest or Status -> Currencies), spend them at the same NPC you get Signet from to buy a ![]() Warp Ring.
Warp Ring.
- The Warp Ring can be equipped and then used as an item to cast Warp on you - returning you to your Home Point - once every ten minutes for free. It's literally the best piece of equipment in the game.
- If you don't have enough CP, but do have Copper Vouchers from RoE completions, you can trade one Voucher for 1000 CP at the Records of Eminence NPC.
- If you used a Gold World Pass, you got 12 free Copper Vouchers. This is the perfect thing to use 5 of them on!
- If you used a Gold World Pass, you got 12 free Copper Vouchers. This is the perfect thing to use 5 of them on!
To use the Warp Ring, equip it, wait for its 8-second cooldown to tick down to zero, then either go into your Inventory, select it, and select "Use" or just type /item "Warp Ring" <me> in chat and hit Enter.
(This guide will get that down to a single button soon. Ctrl-F for "macros" if you can't wait.)
The third quest gives you a ![]() Conquest promotion voucher, which you should exchange for an
Conquest promotion voucher, which you should exchange for an ![]() Empress Band, which increases EXP gain.
Empress Band, which increases EXP gain.
- The Empress Band only has seven charges, but it can be recharged once per week for 100 CP per charge by trading it back to the Signet NPC.
- Even if you have an Echad Ring from a Gold World Pass, you still want the Empress Band to use while the Echad's on cooldown!
- The other two options for this voucher are a Chariot Band and an Emperor Band, each of which give less total experience.
Now, go outside of town for real and get ready to rumble! If you haven't already, make sure you equip your weapon and use the free scroll you were given if you chose a mage job.
FFXI is an old game. Combat is slow at the best of times, and level 1 is nowhere near the best of times. You just auto-attack until you get your combat skill level high enough to learn a weaponskill. And then you auto-attack enough to fill your TP bar to 1000 to spend it all on a single use of that weaponskill... and then repeat.
If you picked a job with spells, combat is different... but only because you can also cast your single starting spell, until you run out of MP and have to sit down for half a minute to regenerate it.
- You won't actually need to sit for MP in this section, because leveling up restores you to full HP and MP.
Introduction to Combat
Just outside the city, you'll see a book called a Field Manual. Examining it, then picking "read about individual training", then selecting "Page 1" (or any later page) will activate Fields of Valor objectives. Killing the listed targets gives you bonus exp and a currency called tabs that you can spend on buffs to help you level faster, like HP regen and defense boosts.
Now that you have entered your first field zone, you have unlocked access to a Records of Eminence objective to defeat enemies in it. Head to Quests > Combat (Region) > Original Areas 1 and undertake this new objective. As you enter new areas, be sure to flag this objective type to maximize Spark and Accolade earnings while traveling.
Selecting a monster and typing /check, or hitting Enter and selecting Check from the menu that pops up, will tell you its level. "Even Match" is the same level as you, and "Tough" is only a few levels above. Higher-level "Very/Incredibly Tough" enemies will be difficult for now. (Eventually you will aim for higher level targets while leveling to get more experience per kill.) The output of /check only tells you two things:
- the target's level and a comparison to yours
- a relative comparison of the monster's evasion and defense to your accuracy and attack.
As you hit enemies, you will gain combat skill levels, which display in your log as “Dagger skill rises 0.1 points”, or whatever weapon you're using. When you get enough, you will automatically unlock weaponskills. A weaponskill spends 1000 or more TP (up to the maximum you can have, 3000) to do damage. Some also do other things like restore MP, heal you, or inflict status ailments. Spend your TP as you get it once you have a weapon skill unlocked, since they deal more damage than autoattacks.
Selling Stuff
With Signet on, you also get ![]() Crystals as drops from defeating enemies.
Crystals as drops from defeating enemies.
- These are consumables used for crafting ,so they're in demand. You can sell full stacks of 12 at the Auction House for some walking-around money.
- There's also a set of repeatable RoE objectives (under Combat → Spoils I) for obtaining each type of Crystal, which you should probably keep active for a while.
Between the Auction House and the RoE rewards, you should be able to fund your Home Point teleportation habit until it becomes 80% cheaper pretty soon.
To sell something on the Auction House (or "AH"), interact with any of the points named "Auction House" located on the windows of the physical AH building in town.
AHs are labeled on your map, and can be found in Bastok Markets/Bastok Mines, Southern San d'Oria/Port San d'Oria, and Windurst Woods/Windurst Walls.
Once you open the little menu, go to "Sell" and select your (single or full stack of 12, nothing in between) item to set a price - you’ll see the history of the last ten sale prices for that item to give you an idea of what to set your price to.
Once the item sells, you have to go back to the "Sale Status" menu and select the item (which will "helpfully" have turned yellow rather than green) to remove it from your "items for sale" so that you can sell more items.
Yes, this is obtuse as hell. The money from sales is put in your Delivery Box, which you can access from your Mog House
Managing Your Inventory
Chances are you are noticing that your inventory space is tight. Fortunately, you have more space available at the start than you might think:
- Inventory, also referred to as Gobbiebag
- 30 initial slots, can be expanded to 80 slots
- Mog Safe 1, located in and only accessible from your Mog House or a Nomad Moogle
- 50 initial slots, can be expanded to 80 slots
- Mog Satchel, given for free to players who have enabled two-factor authentication via the Square-Enix security token, accessible anywhere in the world
- 30 initial slots, expands with your inventory
- Mog Case, immediately available upon character creation and accessible anywhere in the world
- 80 slots, cannot be expanded
- Mog Wardrobe 1 & 2, immediately available upon character creation, the caveat is only weapons, armor, and ammunition can be stored here; accessible anywhere in the world
- 80 slots each, you may purchase more Wardrobes (up to 8 total) for an additional $2 per month
- 80 slots each, you may purchase more Wardrobes (up to 8 total) for an additional $2 per month
This totals out to 270 inventory slots you can utilize right away, though there are more options that are easily accessible such as Mog Safe 2, Storage, and Mog Sack. See Inventory 101 for more details. It's recommended you unequip your armor and weapon and stuff them in a wardrobe. Store items that you are unsure of their value or use in your Safe, Case, or Satchel for later use or disposal.
Finding Other Players
![]() Linkshells are the colored balloons you see next to other players names. A linkshell, or LS, is FFXI's equivalent to a guild or free company, but is essentially only a dedicated chat channel. Finding a linkshell is typically how you should go about meeting other players in game. You can equip up to two linkpearl items at once for two chat channels.
Linkshells are the colored balloons you see next to other players names. A linkshell, or LS, is FFXI's equivalent to a guild or free company, but is essentially only a dedicated chat channel. Finding a linkshell is typically how you should go about meeting other players in game. You can equip up to two linkpearl items at once for two chat channels.
To find a linkshell to join, you should check the Linkshell Concierge in your home nation. It will have a list of recruiting linkshells, E means it is primarily an English linkshell. The three NPCs don't share available linkshells, so check all three when you visit the other two nations in the future.
The NPC will give you a linkpearl item. (Yes, it really is an item in your inventory!) To equip a linkpearl, go to the Menu → Linkshell and select the Linkpearl. You must hold the pearl in a universally available inventory bag (Inventory, Satchel, Sack, or Case) in order to equip it. Once equipped, you may chat with other players with the commands /l or /l2 (that's lowercase L for linkshell), depending on which slot you equipped it to.
Levels 5-10: Building Trust
| Goals: | ||
|
|
|
Rhapsodies of Vana'diel
When you enter a main city zone for the first time after reaching level 5, you will be prompted to begin Rhapsodies of Vana'diel, a Mission line that ties together all the other story Missions and provides incredibly valuable permanent character boosts. Many players choose to progress this Mission line as quickly as possible to gain all the quality of life benefits from it, such as reduced teleportation fees between Home Points, permanent percentage-based Experience Points bonuses, more Trust party slots, and much more. Other players prefer to postpone progression in this Mission line, as it does tie together stories that you may not be familiar with yet, and introduces some characters earlier than you may normally meet them. The decision is yours on which path to follow. Note that if you defer the Mission line, the game will direct you to the Tales' Beginnings floating book should you wish to resume the Mission at any time, and it will be marked on your map.
Trust Magic
Now that you're level 5, you can activate and complete the incredibly important RoE objective Basics → "Call Forth An Alter Ego" to unlock the “Trust” system.
Trusts are SE's answer to a declining player population. Since FFXI was designed to be multiplayer, a lot of content assumes that you have a healer, a tank, and a dedicated damage dealer. One player can't be more than one thing at a time, so Trusts - summoned versions of various NPCs throughout the game- were invented to pick up the slack.
For now, you're limited to three active at once, but you will eventually get two Rhapsody key items from Rhapsodies of Vana'diel missions that give an additional Trust slot each for a full party of six.
To unlock trusts, talk to the appropriate NPC in your city to start a quick quest called "Trust: [city name]".
Completing that quest involves learning, and casting, your first Trust spell.
These can only be cast outside of town, and are located under Magic → Trusts in the "-" menu (or Ctrl-M → Trusts, or target anything - including yourself - hit Enter, and select Magic → Trusts.)
Once you cast your first Trust, you will complete that RoE objective and unlock the next objective in the category, Alter Ego: Valaineral.
You also receive a ![]() Cipher: Valaineral, which you can trade to your city's Trust NPC to obtain the spell that summons Valaineral.
Cipher: Valaineral, which you can trade to your city's Trust NPC to obtain the spell that summons Valaineral.
Go outside and summon Valaineral to complete that objective, unlocking another objective to summon another Trust, and continue until you have the Joachim Trust and no Alter Ego objectives left.
(This Trust NPC does nothing but unlock Trusts with the Cipher items. Since there are a lot of Trusts, you should be prepared to come back here once in a while.)
Joining a Unity
Unity Concord expands the RoE system, and is unlockable once you have completed 10 RoE objectives of any kind. It grants additional objectives and a new currency you can earn with many RoE objectives called Accolades. Activate the RoE objective Tutorial → Basics → "All For One" and talk to one of the Unity NPCs (found near the RoE NPCs) and join a Unity once you're able:
- Urbiolaine in Southern San d'Oria (G-10)
- Igsli in Bastok Markets (E-11)
- Teldro-Kesdrodo in Windurst Woods (J-10)
- Yonolala in Windurst Woods (J-10)
Your choice of whose Unity to join does not mater a whole lot early game but for new players, the best ones to pick are the healer Unity leaders: Yoran-Oran or Apururu. Pieuje is also a healer but is not as well regarded for his healing abilities as the other two.
You wont be able to summon your Unity trust immediately, however: you must earn 5000 Accolades within one week (Sunday to Sunday). Once you do, they will automatically and silently appear in your trust list. They can leave your trust list if you don't gain 5000 Accolades two weeks in a row. You are able to switch Unities once a week.
There are other choices that might be better for you at 99 such as Sylvie.
The important RoEs that being a Unity member gets you access to is a daily set of rotating objectives. (You don't have to complete these every day--they can add up and you can complete multiple of the "same" in one day!) Some of these, like "Vanquish Multiple Enemies" and "Van. Enemies w. Unity Leader" will reward you for a thing you're already doing anyway. More free loot and experience!
More Trusts (or not)
Next, check this month's Repeat Login Campaign to see if there are any Trusts available, and check the current ongoing events for the Spring/Autumn or New Year's/Summer "Alter Ego Extravaganza" events.
Each of those has a fairly large list of Trusts that you can purchase for various currencies. (Most of these currencies you can exchange Copper Vouchers for.)
Trusts particularly worth noting from the campaigns are:
- Shantotto II (the best damage dealer trust by a mile)
- Amchuchu (a good tank)
- Zeid II (fairly good at dealing damage, and also casts Stun on enemies)
- Qultada (an excellent support - the only Corsair trust who actually uses the Corsair's signature ability, Phantom Roll) (sorry, Luzaf trust.)
- King of Hearts (a Red Mage who focuses on buffing the player and removing status ailments from the party)
- Koru-Moru (also a Red Mage, but will buff all party members)
You'll want to get every Trust eventually to unlock some passive buffs for your Trusts, but for now grab what you can. If these events aren't currently running, it's no big deal, they always come back.
For now, your Trust setup should be:
- Valaineral for tanking and annihilating low-level enemies with Uriel Blade
- Your Unity leader for healing (If you don't have the Unity trust unlocked yet, there's Kupipi from the Windurst trust quest, Karaha-Baruha is available for 100 Login Points some months, and if all else fails you are guaranteed to have Mihli Aliapoh from the Trust RoE objectives.)
- Your favorite damage dealer. (If events gave you Shantotto II, use her. Otherwise, pick whoever.)
A few notes on Trust mechanics:
- Trusts are summoned with full HP and MP. This means that you can deliberately unsummon and resummon them to fully heal them, as long as their summon spell is not still on its three-minute cooldown.
- The chat command "/refa all" will unsummon all your Trusts. To unsummon only a specific one, target them and use "/refa" or select them, hit enter, and select "Release".
- Trusts' levels are equal to your level at the moment that you summoned them. This matters when you're low level and advancing quickly - if you level up twice, you should probably take a quick break to unsummon and resummon your team so that they also instantly level up twice - but stops mattering almost immediately when your leveling pace slows down.
- Trusts will only act on enemies that you have engaged and performed at least one melee attack against. They will disengage from an enemy when you do. You cannot order them to attack or retreat independently of your actions. Therefore, even as a job like White Mage or Black Mage, you will need to engage in melee combat against every enemy you wish your trusts to fight.
Macros: A User's Guide
Personally, I am very lazy, so now that I have Trusts, I'd streamline summoning them with macros! Hold Ctrl or Alt to see your macro bars, or L2/R2 for controllers. Now let go of that button and go edit them under "Macros" in the - menu.
Macros have their own "fun" syntax. If you're a Black Mage and you want a macro to cast Stone on the currently targeted enemy, the macro would read:
/ma "Stone" <t>
That's:
- /ma for "use Magic"
- "Stone", the full name of what you're casting (the quotes are not necessary for single words, but will be for "Stone II" and onwards)
- <t>, your current target, who you're casting it on
Other categories for the first option include:
- /ja (job abilities like Berserk or Steal)
- /item (items like Potion or Antidote)
- /ra (a Ranged Attack with your equipped ranged weapon)
- /ws (weapon skills like Fast Blade or Wasp Sting).
The second part in quotes can be any spell, ability, or item in the game.
Other categories for the third option include:
- <me> (you, the player)
- <pet> (a Beastmaster, Dragoon, Puppetmaster, or Summoner's pet)
- <st> (brings up a subtarget selection arrow to pick a target)
- <p2> (the person in the second slot in the party).
So if you want to summon Valaineral, you'd make a macro with one line:
/ma "Valaineral" <me>
But let's say you're even lazier. You don't want to hit three macros to summon your Trusts, you only want to hit one.
The missing piece is the <wait X> command, which pauses for X seconds before executing the next line. You can put it on the same line as an action, so your Trust macro can be all one button and look like this:
/ma "Valaineral" <me> <wait 8>
/ma "Yoran-Oran (UC)" <me> <wait 8>
/ma "Tenzen"<me>
Note that your Unity leader Trust has "(UC)" for (Unity Concord) at the end of the spell's name, even though it isn't in their name on the party list/over their head on the overworld.
While you're making a macro, you might also want to make a Warp Ring macro:
/equip ring1 "Warp Ring" <wait 9>
/item "Warp Ring" <me>
Warp Ring has an eight second cooldown, so the <wait 9> makes sure you wait long enough before you try to use it. Ring1 is the left ring slot and ring2 is the right ring. (If you look at your character's equipment window, you'll see why - they're in that left-to-right order and labelled.)
Another useful macro is the basic one to use a weapon skill, which looks like:
/ws "Fast Blade" <t>
This one uses <t>, for "current target", rather than <me>, because you use WSes on enemies.
Windower users: to have a macro directly input a Windower command, use /console before the command. For example, "/console mh" would be the same as typing "mh" in the Windower Console, which is the command to tell MyHome to use Warp Ring. You can replace the Warp Ring macro above with that single line.
Actually Leveling Up
Go back outside and kill stuff with your new party! You'll marvel at the difference in kill speed with Valaineral! Also the other trusts are there too.
There's a small red dot labeled "Outpost" on the map of one of the two areas immediately outside your city. (Specifically, North Gustaberg, West Ronfaure, or West Sarutabaruta) Try going there and interacting with the Survival Guide. When you're done, you can use it to warp back to the Guide in town. Poke your nose into the next area for more levels if you want, but don't go too far, because you've got a main plot to progress.
Once you're level 10, zoning into your Mog House and talking to your Moogle will start the A Moogle Kupo d'Etat missions. Just so you're not wondering why you got that cutscene. Also, while you're in your Mog House, feel free to drop things off in your Mog Safe.
Starting a Story
Now it's time to start the actual storyline. Near the Conquest Overseer you receive Signet from will be another NPC known as a Gate Guard. These NPCs will be your purveyor of most story Missions.
Specifically, accept the only one you have available, Mission 1-1, and then complete it.
Then do Mission 1-2. Mission 1-3 takes you to a dungeon-esque area full of beastmen near your city. Before you go, you should buy a map of that area at your local Map Vendor!
 Bastok Mission 1-3 is inside Palborough Mines.
 San d'Oria Mission 1-3 is inside Ghelsba Outpost.
 Windurst Mission 1-3 is inside Giddeus.
Completing Mission 1-3 will raise your rank to 2, and then you can ![]() trade Crystals to the mission guard to fill your rank bar again. If you have any extra crystals at this point, you might as well sell them - you'll need more once you're Rank 3, but you'll also have killed a bunch of stuff to level along the way, and gil is likely tighter than crystals for you right now.
trade Crystals to the mission guard to fill your rank bar again. If you have any extra crystals at this point, you might as well sell them - you'll need more once you're Rank 3, but you'll also have killed a bunch of stuff to level along the way, and gil is likely tighter than crystals for you right now.
Making Money
Speaking of, there's a far better and faster method of making gil than selling ![]() Crystals on the Auction House. As you've been completing RoE objectives, you've been acquiring Sparks of Eminence and Unity Accolades. Each of these can be used to purchase items that sell to NPCs for gil.
Crystals on the Auction House. As you've been completing RoE objectives, you've been acquiring Sparks of Eminence and Unity Accolades. Each of these can be used to purchase items that sell to NPCs for gil.
You can talk to the local Sparks Merchant to purchase equipment for Sparks (ignore the non-equipment items until you're 99, if ever - they're all very overpriced.)
Since you're level 10 now, you can buy and equip a higher-level weapon and set of armor. Come back every five levels or so if you want to stay up to date.
When it comes to earning raw gil, an item's purchase price in sparks is determined by its sell price in gil. Every item has the same sparks:gil ratio of about 1:10. This means you can spend sparks on literally any piece of gear, then sell it to a NPC for ten times as much gil as you spent in sparks. Thanks to bots that did this 24/7/365, Sparks got capped - you can "only" exchange 100,000 total Sparks per week, resetting on Sundays, for a total of about one million free gil every week. The highest-price item is the level 75 ![]() Acheron Shield if you want to burn your Sparks at maximum speed.
Acheron Shield if you want to burn your Sparks at maximum speed.
There's a similar method of spending Unity Accolades. Buy Prize Powders, which sell for 100 gil and cost 10 Accolades each. This also capped at 100,000 Accolades per week, for the same bot-related reasons. Think of this as a two million gil per week UBI!
Don't spend all your Accolades, because you can also use them to warp to zones, even ones you haven't been to yet and it's going to be really convenient. That said, feel free to blow some if you need a little walking-around money.
Levels 10-18: Making Progress
| Goals: | |||
|
|
|
|
Leaving Home
The main goal for this band of levels is to unlock your subjob at 18. Subjobs are a second job, capped at half the level of your main job, that grants its abilities and stats to your main job. However, there's no such thing as a free lunch - you'll have to spend time leveling up another job to have those levels when the job is set as your subjob. Otherwise you'll find yourself a THF99/WAR1 without any sweet benefits.
To that end, this section will have you leveling to 18 in zones further out from your starting city and completing a few Rhapsodies of Vana'diel (or "RoV") missions to be rewarded with the ability to set a subjob and the first of the Rhapsody key items, which have really, really varied (and also really strong) benefits. The bright side is that you only need to level them - no other forms of horizontal progression impact your subjob's performance.
Your exact path varies by starting city, but your goal is one of the twin cities of Selbina and Mhaura. (There's a ferry that runs from one city to the other three times every Vana'diel day, or once every 19 minutes and 12 seconds real time, and takes about the same time to make the trip. The correct phrase is actually "sister cities", because they're similar and far apart, not geographically neighboring.)
Get ![]() Signet before you go, because you will also be leveling up along the way and it has a really long duration.
Signet before you go, because you will also be leveling up along the way and it has a really long duration.
Each Nation's 2-1 Mission will ask you to travel through one of the following areas, so go ahead and accept the associated Mission. Don't bother heading back to turn it in right away, our destination of Selbina or Mhaura is more pressing. Once you do make it back to turn in, you will be left with a choice. All Nation 2-2 Missions can be skipped, so it's up to you if you want to do so. None are particularly difficult, nor do any of them have much actual story involved. Either way, we are going to put off Mission 2-3 until a bit later.
- Bastok players:
- You're going northwest from North Gustaberg...
- north through the Konschtat Highlands (which has a Survival Guide)...
- south through the Valkurm Dunes (which has another Survival Guide)...
- ...to Selbina.
- San d'Oria players: You're going south from West Ronfaure...
- south through the La Theine Plateau (which has a Survival Guide)...
- south through the Valkurm Dunes (which has another Survival Guide)...
- ...to Selbina.
- Windurst players: You're going northeast from East Sarutabaruta...
- east through the Tahrongi Canyon (which has a Survival Guide)...
- southeast through the Buburimu Peninsula (which has a Survival Guide)...
- to Mhaura
- ...and eventually you'd take the ferry to Selbina if you wanted to level in Valkurm Dunes like it's 2004. (Sorry, Windurst players. Just use the faster method in the next paragraph if you do want to go there.)
Remember to hit the Map Vendor again before you go!
Faster travel alternative: While I genuinely do recommend making this trip on foot - partially because the lowest-level mob in Valkurm Dunes is level 11, so it may be rough to continue leveling there without some intermediate killing in the areas between - you can get there faster by using a "Unity Warp".
Talking to the Unity Concord NPC in your home city and selecting "bring me to a Wanted Encounter area" will let you teleport directly to a broad variety of locations.
Specifically, there's an arrival point at (G-8) of Valkurm Dunes under "Level 119". From there, take a few steps south and you're in Selbina.
You will begin to find level 10+ monsters once you hit the second zone on your journey, so you can continue to kill appropriate targets appropriately and gain more levels.
Also, you will need three of a specific monster's drop to complete Rhapsodies mission 1-4, so making this walk lets you farm them along the way.
- If you're going to Selbina, you need three Bee Pollens, dropped from Huge Wasps in either Konschtat (near the Crag, your preferred hunting grounds) or La Theine (in many of the valleys, not the ideal location due to the lack of accessibility to most of them).
- If you're going to Mhaura, you need three Mandragora Dewdrops, dropped from Pygmaioi in Tahrongi. (By "going to", I mean "setting foot in first". That locks you into needing this item, rather than the other one.)
- To make your life easier, either farm these as Thief or bring a trust such as Cipher: Lion for Treasure Hunter. Also, don't forget to set some Records of Eminence objectives, such as your chosen zone's Conflict: x, Spoils (Honey), and Spoils (Beehive Chip)
To find these enemies near you even when they're not close enough to be immediately visible, open your Map and select the "Wide Scan" option. This shows all monsters within about a map square radius of you, sorted by internal ID rather than anything sensible like "name" or "monster type", and lets you select a specific monster to "track" on the small in-game compass on your HUD. This is super convenient and used to be exclusive to Rangers and Beastmasters (who still get an expanded radius on their Wide Scan, because this is FFXI) for the first decade of the game's life.
Once you arrive in Selbina or Mhaura (and get a Rhapsodies cutscene), open your map and beeline for the Home Point. Be sure to use it so you don't have to take another walk back. Now you can teleport back to your home city if you need to do some shopping! (If you'd like to change jobs or need to access anything in your Mog House other than Storage, you can do so by talking to the nearby Nomad Moogle, so you don't have to travel just for that.)
Subbing In
If you're not level 18 yet, head back outside and grind until you are. Now talk to Naillina in Selbina or Numi Adaligo in Mhaura and finish their Mission to receive ![]() "Gilgamesh's Introductory Letter", which you then give to another NPC - either Isacio in Selbina or Vera in Mhaura by talking to them twice. Now you have your subjob! (Wide Scan also works on NPCs, in case you're having any trouble finding them.)
"Gilgamesh's Introductory Letter", which you then give to another NPC - either Isacio in Selbina or Vera in Mhaura by talking to them twice. Now you have your subjob! (Wide Scan also works on NPCs, in case you're having any trouble finding them.)
Before going any further, take a brief detour to do two more Rhapsodies missions to get the ![]() "Rhapsody in White" key item, which gives, among other benefits:
"Rhapsody in White" key item, which gives, among other benefits:
- another Trust slot in your party
- +30% EXP earned forever
- +100% weapon skill up rate
- the ability to buy Silent Oil and Prism Powder at any Curio Vendor Moogle (an unlimited consumable non-magical source of Sneak and Invisible for exploration)
- -80% teleportation costs at Home Points and Survival Guides
First, buy a map of Norg from either Lombaria in Selbina or Ludwig in Mhaura. Then talk to Pacomart in Selbina or Tonasav (I-9 in Mhaura) and let them take you to Norg, the secret city of pirates. Examine the Oaken Door at K-8 twice, watching a cutscene each time, and get your Rhapsody KI. Be sure to hit both of the Home Points and the single Survival Guide while you're here - I think it's impossible to get back to Norg right now otherwise without wasting half a million gil on an ![]() Airship Pass that you'll get for free within ten levels.
Airship Pass that you'll get for free within ten levels.
Levels 19-30: To Jeuno, Other Jobs, and Starting Abyssea
| Goals: | |||
|
|
|
|
Moving Out
Head back into whichever of Selbina/Mhaura you were at and grind up to level 20 in Valkurm Dunes or Buburimu Peninsula Now you're good to move on to brighter pastures - the Grand Duchy of Jeuno awaits!
It's a bit of a hike. It can be a dangerous walk if you don't pay attention, it's but mostly just long. You have two options, one of which trivializes the trip:
- If you want to use a modern convenience, talking to the Unity Concord NPC in your home city and selecting "bring me to a Wanted Encounter area", Level 125 → Batallia Downs will plant you right next to a wall with a gate in it. Go through the gate and walk directly into the city of Jeuno!
- From this point forward in the guide, I will simply be saying "use the level 125 Unity warp to Batallia Downs" rather than repeating the full explanation every time.
- If you want the classic 2005 FFXI experience, walk instead! Buy some Silent Oil and Prism Powder from the Curio Vendor Moogle in your hometown. You can use these to cast self-targeted Sneak and Invisible. We had those in 2005, and they were always recommended for stuff like this, so it's not cheating.
- If you're walking, teleport back to a Survival Guide you touched earlier and continue onwards via one of these routes:
- Bastok: Konschtat Highlands, and northeast to
- Pashhow Marshlands, and northeast to
- Rolanberry Fields, which connects to Lower Jeuno
- San d'Oria: La Theine Plateau, and east to
- Jugner Forest, and northeast to
- Batallia Downs, which connects to Upper Jeuno
- Windurst: Tahrongi Canyon, and northwest to
- Meriphataud Mountains, and northwest to
- Sauromugue Champaign, which connects to Port Jeuno
Reminder: Before you go to Jeuno, pick up a ![]() Warp Ring for 5,000 Conquest Points! If you don't have that much, but do have some Copper Vouchers, you you can trade each Voucher for 1,000 CP at Records of Eminence NPCs.
Warp Ring for 5,000 Conquest Points! If you don't have that much, but do have some Copper Vouchers, you you can trade each Voucher for 1,000 CP at Records of Eminence NPCs.
Welcome to Jeuno
Welcome to Jeuno! Near where you entered, there's a Home Point. The other end of the zone has another Home Point, a Mog House entrance, and sets of stairs connecting all four of Jeuno's zones and Qufim Island, where you will shortly be leveling. Along with two Home Points in the Upper/Lower/Port Jeuno, there's also four and a Survival Guide in Ru'Lude Gardens.
Entering Lower Jeuno specifically gives you a cutscene starting the A Crystalline Prophecy missions. You may elect to opt out of this Mission line and resume it at a later time. It, along with A Shantotto Ascension and A Moogle Kupo d'Etat are side-stories which are not canon to the other Mission lines. The rewards for these Missions provide some very niche augmented gear which are not a high priority at this time.
Settle in, hit the Mog House, sell some stuff on the Auction House, whatever you want. Before you do anything else, get a rideable mount! Mounts prevent you from being aggroed by monsters, which is great. This quest is why the recommendation is to specifically hit level 20 before coming to Jeuno, as that's a prerequisite.
Catch a Ride
Go to Upper Jeuno. If you don't already have the ![]() Map of the Jeuno area, talk to Rusese inside the shop at H-6 and buy it, because it is a prerequisite for the mount quest for some insane reason. Grab Home Point #3 while you're here - Upper Jeuno has an extra one relative to Lower and Port for some reason.
Map of the Jeuno area, talk to Rusese inside the shop at H-6 and buy it, because it is a prerequisite for the mount quest for some insane reason. Grab Home Point #3 while you're here - Upper Jeuno has an extra one relative to Lower and Port for some reason.
After that, talk to Brutus at G-7 (down the stairs) to start the quest Chocobo's Wounds. This quest requires you to acquire 4 Gausebit Grass, which are either about 10k gil each on the Auction House or drop from Wadi Hares in Dangruf Wadi (a Bastok area, past South Gustaberg) or Crane Flies in Meriphataud Mountains (on the Windurst path to get to Jeuno, connected to Tahrongi Canyon).
Once you get them, trade them to the sick chocobo and receive the ![]() Chocobo license key item. This license... lets you buy Chocobo rides from vendors, FF6-style. One ride per purchase, and the instant you dismount (or after 20 minutes) it's gone. Frankly it's useless. But it's a prerequisite to the real deal!
Chocobo license key item. This license... lets you buy Chocobo rides from vendors, FF6-style. One ride per purchase, and the instant you dismount (or after 20 minutes) it's gone. Frankly it's useless. But it's a prerequisite to the real deal!
Talk to the nearby Taru in a chocobo suit, Mapitoto, to start the quest Full Speed Ahead!. After a (frankly awful) raptor riding tutorial mission, you will unlock Mounts. Don't worry about failing the quest the first time, you can repeat it as many times as you like until completion, and will even be offered a lower difficulty after the first failure.
Now you can ride the raptor anytime by either selecting Mount under the Abilities menu or using the text command "/mount Raptor". I'd just make a macro for the latter.
Other mounts are available from login campaigns and quests. Personally, I'm fond of Omega and the cute lil' Xzomit.
Two Great Trusts
Now's the time to get Rank 3! Not because you particularly derive benefits from the intended reason to do so, but because being on your nation's Mission 2-3 lets you pick up two powerful trusts. Once that you've got your mount, head back to your home city and accept Mission 2-3. (Remember, you can skip Mission 2-2 if you like!)
Doing 2-3 will require you to visit the two starter cities that you didn't start in. Again, you can either use the Unity Concord NPCs or walk:
For example, to get to Windurst, you have to either:
- go back to Selbina
- take the boat to Mhaura
- walk Mhaura → Buburimu Peninsula → Tahrongi Canyon → East Sarutabaruta
- and finally arrive in Windurst
...or, far easier: talk to the Unity Concord NPC in your home city, tell them to "bring me to a Wanted encounter area", and select Level 75 → East Sarutabaruta. Then just stroll right into the city.
For San d'Oria, it's Selbina → La Theine Plateau → West Ronfaure → San d'Oria, or the level 75 Unity Warp to East Ronfaure. And for Bastok, it's Selbina → Konschtat Highlands → North Gustaberg → South Gustaberg → Bastok, or the level 75 Unity Warp to South Gustaberg.
While you're in the progress of doing Mission 2-3, talk to two specific NPCs for two new trusts:
- To get Semih Lafihna, talk to Kupipi behind the desk in Heavens Tower in Windurst Walls.
- To acquire Halver, talk to Halver himself in Chateau d'Oraguille, just north of Northern San d'Oria.
Replace whatever DPS Trust you were using with Semih forever. Like Valaineral, she's just a cut above everything else you have access to right now. Then use the extra slot from RoV 1-6 on Halver for now. (That said, Halver's definitely worse than Shantotto II if you already have her from Login Campaigns.)
While you're doing Mission 2-3, you will have to go into two beastmen-controlled dungeon-esque areas near the cities.
Before you go, hit a local Map Vendor to get maps to save yourself some pain, and once you're in there, make sure to hit the Home Points at the end of each, even if that requires a detour for one of them.
Reaching Level 30 and Doing Stuff
Once you're ready to continue leveling - ideally after a quick trip to spend some Sparks on a new weapon and some armor - grab ![]() Signet from one of the guards near the Jeuno exit gates.
Signet from one of the guards near the Jeuno exit gates.
Then head to Port Jeuno and down the stairs near the Mog House (not the ones leading up to Lower Jeuno.) You should see a NPC named Oboro at the bottom with a crowd of AFK players selling items in their Bazaars nearby. Ignore him completely until you're level 99 and go through the doorway to zone into Qufim Island.
Sneak through the tunnel here (figuratively or literally) and head for the lake at H-7 to kill Land Worms, then move on to Clippers, Land Pugils, and Gigases of various types. Grab the Home Point nearby and the Survival Guide outside Lower Delkfutt's Tower to the northeast while you're here, because you'll be coming back for missions fairly soon.
When it's feeling like the experience gain is slowing down, pop inside Lower Delkfutt's Tower - getting a cutscene to start the Chains of Promathia missions - and hit the Survival Guide here while continuing to kill everything in sight until level 30.
Starting Some Clocks
Once you're Rank 3, go to the "Mog Dinghy" in Port Bastok (K-11) / Port San d'Oria (I-8) / Port Windurst (C-8) and interact with it to be taken to your Mog Garden.
This is a private instanced zone where you can gather materials a set number of times per day - some of which are valuable enough to bother selling on the AH. The only way to be able to gather more times per day is to purchase key items that are gated behind having already gathered a fixed number of times, so you want to start early!
(You may not want to spend gil on the level-up key items from the nearby Skipper Moogles, since there's another currency you can use for payment once you reach Adoulin. If you have extra gil, go for it, otherwise wait to use the Adoulin currency, bayld, with Zenicca.)
Once you're level 30, you can - and immediately should - start the Abyssea storyline. Zone into Port Jeuno on your level 30 job for a cutscene, then talk to Joachim at H-8. After this, you have to enter Abyssea exactly once to start the ![]() traverser stone accumulation timer. The fastest way to do this is to teleport to the Valkurm Dunes Survival Guide and examine the nearby Cavernous Maw at I-9 to the southeast.
traverser stone accumulation timer. The fastest way to do this is to teleport to the Valkurm Dunes Survival Guide and examine the nearby Cavernous Maw at I-9 to the southeast.
Once you enter Abyssea, head back out the way you came, go back to Port Jeuno, and talk to Joachim again. Now your traverser stone accumulation timer has started ticking (at a rate of one stone per sixteen IRL hours) and you can ignore Abyssea until you actually care about it!
Quality of Life
There's also a few minor stops you should make now for quality-of-life purposes. In no particular order:
The other way to get to the Mog Garden is exiting directly from your Mog House after completing an individual city's Mog House Exit Quest. These quests are pretty simple (just a single item traded to a NPC) and have a great reward - not only do they let you exit from your Mog House out to any zone in a city regardless of the zone you entered from, but they let you go to the Mog Garden as well
Better yet, completing all three of the starter nations' quests also unlocks your Mog Safe 2 to store 80 more items in. I mention this here, rather than in an earlier section, because the flowers for the three starter city quests can be bought for 120 gil each from Areebah in Upper Jeuno.
Speaking of item storage, Jeuno is also the location of the ten Gobbiebag quests, each of which expands your Inventory by 5 slots to a final total of 80. You may need more Fame to start them, so check that page for information on the quick repeatable quests to use (Mandragora-Mad for Windurst and Only the Best for both Bastok and San d'Oria simultaneously.)
You can also buy a Mog Sack from the Artisan Moogle in Ru'Lude Gardens at (I-9) for 9,980 gil. This is another bag, the same size as your Inventory (talk to the Moogle again every time you finish a Gobbiebag to have it expand the Sack to match), that works just like every other inventory.
Once you're rank 3, you can get the Ayame trust by talking to Ayame in Metalworks. She's not as good as Semih Lafihna, but she opens skillchains for you. This is especially useful if you already have Shantotto II, because all you want to do is get her to Magic Burst early and often.
Early Advanced Jobs
Also at 30, the Job Quests for Paladin, Dark Knight, Beastmaster, Bard, Ranger, Samurai, Ninja, Dragoon, and Summoner open up. Later on You'll have access to a few more Advanced Jobs, but we'll go over those as they come up. If you're interested in one of these, feel free to take some time off and get that to 30 and hey look, your new main job. Have fun!
|
Job |
Description |
| Paladin |
PLD is the classic Sword and Shield knight, and the best tank when it comes to reducing physical damage or handling large numbers of enemies. Not only that, it can keep its party alive with surprisingly potent healing spells! It does tend to lack damage, however. |
| Dark Knight |
DRK is all about offense! It hits slow and hard, and can sacrifice its own HP and defenses to power-up its attacks. It also has a suite of black magic spells to add some extra utility (and damage!). DRKs mostly use Great Swords and Scythes. |
| Beastmaster |
BST is the first dedicated pet job on the list. It can Charm enemies into doing the fighting for you (or use special Jug items to call upon unique pets) - which can be very powerful and provide a wide array of damage and debuff options. The BST itself doesn't have as much of a spotlight, but can deal decent damage with one-handed Axes. |
| Bard |
BRD is a dedicated support job, using a wide range of songs to provide powerful buffs to their party. They don't deal much damage on their own, but can drastically improve the damage of those around them - and have a few debuff songs to boot! They primarily wield one-handed Daggers. |
| Ranger |
RNG spends its time standing back and tearing enemies up with ranged attacks from Bows, Crossbows, and even Guns. It provides very little party support beyond its damage - but boy oh boy does it deal damage, arguably the most in the game. That damage comes at a price though, as you'll need to buy ammunition for all those ranged attacks. |
| Samurai |
SAM specializes in gaining lots of TP quickly. It can generate it out of thin air with Meditate and preserve it with Sekkanoki, meaning you can dish out Weapon Skills fast enough to Skillchain solo! SAMs are the only job to specialize in Great Katanas, though they can also use Bows for ranged attacks. |
| Ninja |
NIN is a flexible job with a wide range of options. It can deal decent physical damage, and can cast Ninjutsu spells to add magic damage as well. It can also be a decent tank, as its Utsusemi ninjutsu allows it to automatically evade most attacks - even some spells! It primarily dual-wields one-handed Katanas, and can use Shurikens for ranged attacks. |
| Dragoon |
DRG gets a pet wyvern! Or, is it a dragon...? Anyways, The pet is mostly automated, so if you're not into micro-management, no need to worry. DRG is one of the more active jobs, with a variety of jump abilities to generate TP very quickly. Its wyvern pet also can provide utility depending on your subjob - it can even heal! DRGs primarily wield two-handed Polearms such as spears and lances. |
| Summoner |
SMNs can control the classic Final Fantasy summons (Shiva, Ifrit, etc) as their pets. These summons can be difficult to attain, but are extremely powerful - providing a ton of damage, buffs, debuffs, and even other utility such as healing. The summoner themself is fairly frail, however, relying entirely on their summon to do their dirty work for them. They wield two-handed Staves, but don't expect to be dealing much melee damage with them. |
Levels 30-50: Home Points, Survival Guides, Missions, and So On
| Goals: | ||
|
|
|
At the end of this large section, you should be level 50.
That said, there's a lot to do in this game, and you can do as much or as little of it as you please. Don't let me boss you around - I really mean that, because I'm going to just throw info at you and it absolutely does not have to be all done at once. You only experience this for the first time once.
Home Points and Survival Guides
In general for these trips, you want to be mounted in every zone you can be to avoid aggro. If you can't be mounted, break out the Silent Oil and Prism Powder.
Some enemies (though it's rare, and mostly Notorious Monsters with unique names) are still "true sight", so you may have to run from some stuff if you aren't mounted.
Undead also have "blood aggro" so make sure your HP is not in the yellow or below - if you're not fighting, this is generally easy, but be careful if you're swapping gear.
Some other mobs are "magic aggro", so don't cast Sneak or Invisible around them if you're on an actual mage job! Oils and Powders are fine, just no spells. Magic aggro is generally restricted to Arcana - Golems, Magic Pots, Cardians, and bombs - and elementals. Give or take some random other stuff.
In no particular order, here's all the destinations:
| ExpandHome Points and Survival Guides |
|---|
Going to Adoulin
You can start the Seekers of Adoulin missions by talking to Darcia in the Chamber of Commerce in Lower Jeuno at (H-7). Once you get to Western Adoulin proper (mission 1-5), talk to an NPC named Task Delegator (closest one is right next to you at Western Adoulin E-8) to begin accruing imprimaturs a rate of one per 6 hours real-life time. The cap is 15, so you'll want to burn some every few days to slowly work towards completing every Coalition Assignment. Since you're not level 99 yet, use them on the Inventors' Coalition (buy items off the AH) or the Couriers' Coalition (teleport to a nearby Waypoint and interact with a NPC) rather than the others, which require more work or even combat.
Adoulin Mission 1-6 is gated behind a combination of Adoulin fame and imprimaturs spent (you will have to spend at least 11 imprimaturs even with maxed Adoulin fame.) Theoretically, you don't have to fight anything until Adoulin Mission 2-7-1. In practice, there's a lot of sneaking in between and some traveling on foot aided by key items that require level 99. Adoulin has two Home Points in each of Western Adoulin and Eastern Adoulin plus a Survival Guide in Eastern Adoulin close to the second home point.
Chains of Promathia
The early Chains of Promathia missions used to be level capped and intended for full parties. You can get up to Promathia Mission 3-3 at level 50 solo with Trusts. Chapter 1 originally capped at 30 and Chapter 2 originally capped at 40, so if anything you're ahead of the intended power level.
These missions will open up Home Points in Tavnazian Safehold (three of them), Misareaux Coast, and Riverne - Site A01, plus Survival Guides in Tavnazian Safehold, Lufaise Meadows, Misareaux Coast, and Phomiuna Aqueducts.
Abyssea
Take trips to briefly enter the rest of the Abyssea Cavernous Maws in:
- Konschtat Highlands
- Tahrongi Canyon
- La Theine Plateau
- Jugner Forest
- Buburimu Peninsula
- Valkurm Dunes (This is the one I recommended touching earlier. In case you used another, I'm listing it here too.)
- Xarcabard
- South Gustaberg
- North Gustaberg at (G-7). (There are two different Cavernous Maws in North Gustaberg.)
By "briefly enter", I mean "enter, watch a cutscene, talk to the Conflux Surveyor to get Visitant status, then leave". Visitant status is essential, otherwise you will be locked out of reentering Abyssea for an hour after you leave. Now you can use Horst (next to Joachim) to teleport back to these Maws for cruor later, once you have cruor.
Join the Mob to get to Aht Urhgan
Talk to Ghebi Damomohe inside the totally legitimate "Neptune's Spire" in Lower Jeuno and complete a brief quest to officially join the Tenshodo, Vana'diel's finest organized crime syndicate.
Now that you're in the mob, go down to their secret basement bar coincidentally located just below this legitimate establishment to get yourself a mercenary license
I recommend the advanced path, which is not nearly as advanced as it sounds. You don't (yet) have ![]() Rhapsody in Umber to purchase Coffer Keys freely, but can farm them very easily.
Rhapsody in Umber to purchase Coffer Keys freely, but can farm them very easily.
Once you complete this quest, you unlock the first of the Aht Urhgan missions. You can get through mission 11 without any combat.
This opens up four Home Points in Aht Urhgan Whitegate, plus one each in Nashmau, Bhaflau Thickets, Halvung, and Mount Zhayolm, along with Survival Guides in Aht Urhgan Whitegate, Wajaom Woodlands, Mamook, Aydeewa Subterrane, Halvung, and Nashmau.
(There are also Home Points and Survival Guides in Caedarva Mire and Arrapago Reef, but they require a lot of stealth and navigation, so I'd personally skip them for now.)
Rank 3 Missions
You shouldn't have any trouble with these at this level.
Mission 3-2 is skippable.
Speaking of key items that open doors, there's some more of those designed to skip doors that would otherwise require three players. It's wise to pick all of these up now, since you will need some (possibly all) of them later for some combination of Limit Break 1, your Artifact Armor, and Zilart Missions
 Pouch of weighted stones - Lets a solo player open the Banishing Gates in Garlaige Citadel.
- Interact with a ??? in Garlaige Citadel on map 1 at (G-8) to obtain this. (Not the one in the ceiling.)
- Magicked astrolabe - Allows a player to pass through the gates in Eldieme Necropolis solo.
- Pay Churano-Shurano in Windurst Waters (North) (F-8) 10,000 gil to obtain this.
- Loadstone - Lets a solo player open the weighted doors in Quicksand Caves, even if they're not a Galka.
- (This is somehow not a joke. They're heavier, so they can open the door solo.)
- Complete the quest Open Sesame to obtain this.
Some More Missions
You can technically start the Wings of the Goddess missions now, but the first fight wants you to be level 75+. That said, there's four Home Points and twenty Survival Guides in the past if you truly desire.
You can similarly start any or all of A Crystalline Prophecy, A Moogle Kupo d'Etat, and A Shantotto Ascension.
Each rewards the players with a piece of customizable augmented gear. All of them are very niche, however. Beastmasters will enjoy the Call Beast recast reduction on Mirke Wardecors, Corsairs will enjoy the Phantom Roll recast reduction from Desultor Tassets, and Dancers will enjoy the Waltz recast reduction from Anwig Salade. Again, these are all very minor benefits. The stories themselves are considered non-canon, and more of a "what if...?" scenario for various storylines.
Starting RoV Mission 1-7 temporarily locks you out of Escha - Zi'Tah, which is a very popular leveling area. You'll have to clear RoV 1-9 at around level 45ish to get back in there, and you'd start leveling there at 40 at earliest, so it's not much of a problem, but it's enough of one that I'm noting it here for the second time.
Some More Advanced Jobs
Now that you have access to all the expansion areas, you also have access to all the jobs! Here are the newly-available advanced jobs.
|
Job |
Description |
| Blue Mage |
BLU use enemy skills to be able to do almost anything from deal damage to tank to heal - all depending on which specific spells you decide to "equip". However, learning spells can be time consuming, and will take you all over the world. They also can deal decent melee damage with Swords, and later on can dual-wield them. |
| Corsair |
COR is a gambling buffer, playing a quick push-your-luck minigame to give AOE buffs to their party. Bad luck can cause a Bust though, which removes the buff from the party (and debuffs you). They primarily use Guns for ranged attacks, but can wield Daggers and Swords when getting close. |
| Puppetmaster |
PUP has a customizable Automaton pet that is very cute - and very strong! How you decide to deck out your little buddy determines what they can do - tank, heal, nuke, deal damage, you name it they can do it! The PUP itself can dish out solid damage using Hand-to-Hand weapons as well. |
| Dancer |
DNC is a flexible and busy job. Managing a unique resource called Finishing Moves, it uses Sambas, Waltzes, Steps, and Jigs to generate free TP, deal big burst damage, debuff enemies, and even heal party members! They almost exclusively dual-wield Daggers. |
| Scholar |
SCH can flip-flop back and forth between specializing in white and black magic. It uses a unique resource called Stratagems to power-up its large suite of spells in unique ways, and can be either a potent healer or nuker - or both, if your fingers are fast enough. Like other mages, it primarily uses Staves. |
| Geomancer |
GEO is a support job that can place down "bubbles" that provide powerful buffs and debuffs. These Luopan bubbles are technically pets, though there is very little micromanagement required - they're mostly set-and-forget. GEO can also provide fairly powerful AOE nuke spells, which can be buffed by proper positioning! They primarily use one-handed Clubs, and cast magic using Handbells. |
| Rune Fencer |
RUN is a tank that can imbue itself with elemental runes to resisting magic damage and status effects. It has a wide range of job abilities to provide extra defenses or deal damage, all based around what runes you decide to harbor - so you'll need to change up your runes on the fly depending on what you're fighting. Despite the name, they wield Great Swords - though as a tank, don't expect to deal tons of damage. |
Enough Distractions, Let's Level Up
First of all, don't forget ![]() Signet.
Signet.
You've got a few reasonable options and infinite mediocre ones. Since you're starting to punch a little further up, you may want to consider purchasing Jack-o'-Lanterns from a Curio Vendor Moogle for +10 accuracy. At 400 gil for 30 minutes of food buff, they can cheaply help bridge the gap into a new area. (After RoV mission 1-11, you can buy Pepperoni Slice instead and get attack too.)
- Bibiki Bay - levels 30-38 - walk through the zone starting at the entrance, fighting Rarabs and Efts and then also Goblins and Birds. Don't go too far.
- Yuhtunga Jungle - levels 30-34 - Ivory Lizards and Jungle Coeurls at K-8. A little awkward to navigate, but nothing extra-dangerous.
- Attohwa Chasm - levels 30-38 - An uncommon choice, but there's never anyone here so it’s always full of enemies. Zone in from Maze of Shakhrami and fight your way to the surface through the tunnels, killing all the Worms and Hecteyes on the way (Hecteyes aggro, Worms link.) Once you make it out into the open, you’ll have gained a few levels and be able to handle the roaming Antlions and Goblins. Don't go far into the narrow rocky areas, as hidden underground Antlions will ambush you, and watch out for the Scorpions who are stronger than the other enemies in the area.
- Crawler's Nest - levels 32-42 - A time-honored camp from 2004. Start at the entrance and proceed forward, killing Hornets in the tunnel, then Crawlers in the tunnel, then Crawlers and Lizards down the drop, then Crawlers and Lizards and Beetles down the tunnels.
- Garlaige Citadel - levels 32-42 - Another classic. Start with Bats and Beetles near the entrance, then Skeletons slightly further in, then "everything that moves upstairs". Don't fall down a hole...
- Garlaige Citadel part two - levels 42-50 - ...until you hit about 42, at which point you can drop down the first hole on the left from the entrance, then walk north to the stairs and kill Citadel Bats there. Do not go anywhere else in the basement, because it's all level 60+.
- Eastern Altepa Desert - levels 34-40 - exit from Rabao and proceed forward. Start with Worms and Spiders, then add Beetles and Dhalmels as you level.
- The Sanctuary of Zi'Tah - levels 37-42 - warp to the Survival Guide and kill everything in sight.
- Labyrinth of Onzozo - levels 40-47 - warp to the Survival Guide and kill nearby Goblins and Leeches.
- Eldieme Necropolis - levels 40-50 - warp to the Survival Guide, start with the nearby Hounds and Skeletons, then go further in and move up to Ghosts and Shades as well.
- Most of this zone is Undead that aggro to both sound and low HP, so watch out... but Valaineral has your back.
- Gustav Tunnel - levels 44-50 - Survival Guide warp to the entrance and kill everything in sight
- Yhoator Jungle - levels 45-50 - warp to the Ifrit's Cauldron Survival Guide, then walk back out and kill everything in sight.
- Bostaunieux Oubliette - levels 46-50 - warp to the Survival Guide and kill the four nearby bats repeatedly.
- While this is definitely a one-person camp, I personally really like it.
- Escha - Zi'Tah - levels 45-50 - see the above note! You will lock yourself out of this mission if you begin RoV 1-7.
- Once you're inside, kill Worms, Obdellas, and Crawlers near the entrance - they're higher level than you typically want to target, but not by much. You should be okay.
- Note that mobs in Escha can spawn Notorious Monsters when killed. You may or may not eat it to Hugemaw Harold. There's a temporary item called a Mollifier that stops this... but it doesn't work when Trusts, rather than players, land the killing blow, which they almost always will at your level. Just part of the cost of doing business, sadly. This will be true for all Escha leveling.
Levels 50-55: Breaking Limits and Doing Deeds
| Goals: | ||
|
|
|
Limit Break 1
Beginning at 50 (and every 5 levels after) you have to complete a Limit Break quest to raise your level cap by 5 before you can go higher.
These quests are given to you by a spry old chap named Maat at (H-5) in the very back of Ru'Lude Gardens:

At 50, you will have to complete In Defiant Challenge, a collectathon of one dropped item or three (much easier) static ???-point items from each of Garlaige Citadel, Eldieme Necropolis, and Crawler's Nest. (The ??? points were added in 2015. Casting the highest lot in your party to get that Ancient Papyrus was a rite of passage in 2005. Just go find those ??? points.)
For the subsequent Limit Break quests, you become eligible to begin them when you're one level past the former cap. This means you can start LB2, Atop the Highest Mountains, as early as 51 or wait until you're capped at 55. It's a pretty quick one - just pick up three items from ??? spots in Xarcabard.
Important Note on Experience Gain
If you didn't already, go complete Rhapsodies Mission 1-9 by checking the entrance to Escha - Zi'Tah right next to the Home Point in Qufim Island and defeating the enemy that spawns there.
Then do two more RoV missions. Completing Rhapsodies Mission 1-11 rewards you with ![]() Rhapsody in Umber for another +30% experience gain.
Rhapsody in Umber for another +30% experience gain.
Deeds of Heroism
Now that you're this deep, you know whether or not you're in FFXI for the long haul. If you aren't, no shame. You can skip ahead to the next section.
If you are, now is the time to check the Monthly Records of Eminence objectives. Each of these four objectives rewards 10 Deeds of Heroism, which earn you rewards from the A.M.A.N. Validators located in each starting city.
These objectives rotate once per month (after server maintenance) and there are four objectives active per month.
Short-term, aim to get 70 total deeds (month 2, at earliest) for a ![]() Deed Voucher, which saves a fair chunk of time and effort reforging a job's Artifact Armor.
Deed Voucher, which saves a fair chunk of time and effort reforging a job's Artifact Armor.
The most important long-term goal is 480 deeds (12 months of full deed completion, at earliest) to obtain the Monberaux Trust. You know, that guy you totally remember from the rank 2 missions and his clinic by Upper Jeuno Home Point #3. Best healer Trust in the game.
Some Deeds objectives can't be done at level 50 - the High-Tier Mission Battlefields start at level 99, the lowest-level Wanted fights are level 75, and Walk of Echoes content starts at level 70 - but it's still good to be aware of Deeds now rather than later.
Five More Levels
Don't forget ![]() Signet... except for the areas where you should. See below.
Signet... except for the areas where you should. See below.
- Bostaunieux Oubliette - levels 50-54 - Survival Guide and the same four bats at the entrance. Again.
- Escha - Zi'Tah - levels 50-55 - Worms, Obdellas, and Crawlers near the entrance. Again.
- Wajaom Woodlands/Bhaflau Thickets - levels 54-55 - Getting here requires completing Aht Urhgan Mission 2, but it's definitely worth it.
- Lesser Colibri are located just outside of Al Zahbi in Wajaom, and slightly north of the Al Zahbi exit in Bhaflau. Colibri are great. They were the developers' gift to melees in 2006 and they haven't changed.
- They are so good that I'm not messing with other options here like Robber Crabs and Sand Lizards in Kuftal Tunnel.
- Lesser Colibri are located just outside of Al Zahbi in Wajaom, and slightly north of the Al Zahbi exit in Bhaflau. Colibri are great. They were the developers' gift to melees in 2006 and they haven't changed.
Since Wajaom and Bhaflau are Aht Urhgan areas, you don't want Signet, you want ![]() Sanction. It's the ToAU version of Signet, giving you Imperial Standing instead of Conquest Points.
Sanction. It's the ToAU version of Signet, giving you Imperial Standing instead of Conquest Points.
The easiest NPC to get Sanction from is Asrahd in the central square of Aht Urhgan Whitegate by Home Point #1.
Levels 55-60: Beating the Game
| Goals: | ||
|
|
|
To Rank 6
Now that you're level 55, you can complete the rank 4 and 5 missions with Trusts, culminating in the Shadow Lord fight at the end of Mission 5-2.
This was a huge deal back in the day - it wasn't even beaten for the first time until they raised the level cap to 55!
Don't forget to hit the Home Point outside the Throne Room in Castle Zvahl Keep, because it's a long walk and you'll have to come back a few times for other missions.
You can certainly do the Rank 4 missions earlier than level 56, but here's the clever part:
- Mission 4-1 (identical for every nation) requires you to go to deep parts of Davoi, Beadeaux, and Castle Oztroja.
- Limit Break 3, Whence Blows the Wind, requires you to go to... slightly deeper parts of Davoi, Beadeaux, and Castle Oztroja.
- Pick up the quest from Maat at level 56 and you can double dip.
Once you complete LB3, your new level cap will be 65.
No More Rhapsodies For Now
Rhapsodies Mission 1-16 is a level 80ish fight, so you can't clear it solo right now. If you're willing to beg for help with it, you can clear as far as RoV 2-13 with just that one fight.
- Completing Rhapsodies Mission 1-16 gets you Rhapsody in Azure for +30% exp.
- Further completing Rhapsodies Mission 2-13, you get Rhapsody in Crimson for another +30% exp and your fifth and final Trust slot. This requires:
- Clearing CoP 3-2, so that you can progress through RoV 2-2.
- Clearinng Aht Urhgan Mission 12 to get past RoV 2-7, which is just killing some level 62-65 enemies for a dropped item.
Lookin' Good
Once you're level 60, consider taking a break. Your friendly Sparks vendor no longer offers you armor options for levels 50 and beyond - and I bet you're a fashion disaster too. Let's change that. It's time for Artifact Armor, or "AF":


AF is a set of armor pieces at levels 52, 54, 56, 58, and 60, designed to look like a classic FF version of your specific class and with specific stats (supposedly) designed to go with the job. Of course, these are stats from pieces of mid-level 2004-era equipment, so they'll be obsolete quickly... until you hit 99 and reforge each piece up to four times to bring it up to modern standards. And it's quite the difference! For example:
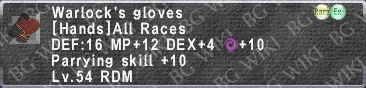
|
becomes | 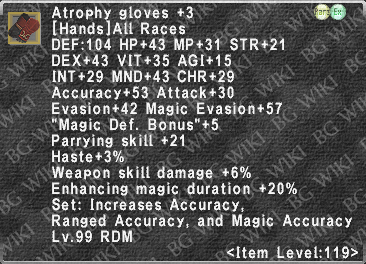
|
There's also a level 40 AF weapon. You have to get it first to start the armor quests, but feel free to immediately throw it away. Or keep it for lockstyle if you like the look of it.
Consult the Artifact Armor page to find your quests.
Once you've completed the level 52 quest for the hands, "Borghertz's [adjective] Hands", you can also open two additional coffers in the zones indicated for the leg and body pieces.
You may already be familiar with Treasure Chests in some dungeons, but it's important to know that these are different from Treasure Coffers. Each chest type uses a different type of key, so make doubly sure you are picking up the right key when hunting these coffers.
Treasure Coffers spawn at fixed points in each zone that has them - there's only one in existence at a time, and a new one spawns five minutes after the last one was opened.
To open the coffer, select it and then "Trade" it the appropriate key. You can buy the keys directly from a Curio Vendor Moogle since you have ![]() Rhapsody in Umber.
Rhapsody in Umber.
While you could stumble around at random, I'd recommend using each zone page's map to see possible spawn locations. It's not inherently stated in all zone's maps, but the blue squares represent Treasure Chests while the reddish/purplish squares represent Treasure Coffers. Knowing all this, it's simply a matter of checking each possible spawn location one-by-one until you find your prize.
Back to the Grind
Now that you've got your new sweet gear, you can keep leveling! Remember![]() Sanction for ToAU areas.
Sanction for ToAU areas.
Leveling for 56-60:
- Wajaom Woodlands/Bhaflau Thickets - levels 55-60 - Still Lesser Colibri. Love those birds.
- Caedarva Mire - levels 55-60 - Attacking Wild Karakul at (I-8), but the real kill target is the Chigoes they spawn when they use a TP move.
- Summon Valaineral and Semih Lafihna and have them clean up with AoE WSes while you attack the Karakuls. This can go so fast it feels like cheating if you're lucky with the Chigoe spawns.
- Don't forget the "Conflict: Caedarva Mire" RoE objective in the category "Combat (Aht Urhgan)", since rapid Chigoe kills make it even better than usual.
- Escha - Zi'Tah - levels 55-60 - Worms and Crawlers right next to the entrance first, then Dhalmels, Coeurls, and Weapons by portal #2 to the north.
- Portals in Escha work like Home Points, but cost silt that you earn by killing mobs.
- You have to touch them to activate them before you can use them.
Levels 60-65: Getting into the Grind
| Goals: |
|
Honestly, I haven't got much to say here. Push through to 75 and you'll hit the level cap that lasted longest in FFXI's early history.
An Easy Limit Break
At level 61, you can complete Limit Break 4, Riding on the Clouds, to raise your level cap to 70. It just requires talking to some NPCs and turning in four Kindred's Seals.
If you don't have Kindred's Seals, but do have Beastmen's Seals, you can trade them all to Shami in Port Jeuno at (H-8) to store them, then talk to the completely different NPC Shemo right next to Shami to exchange one variety of Seal for another.
- This will likely come up again later when you need different Crests for later Limit Breaks.
- In general, Seals drop off any mob that gives you experience once every 5 real-life minutes, and which Seal or Crest you get is determined by the mob's level:
- The lowest level mobs drop Beastman's Seals, then Kindred's Seals, High Kindred's Crests, and finally Sacred Kindred's Crests.
- I used to have a joke about Shami and Shemo in this guide, but - for some inexplicable reason - they get actual screentime in The Voracious Resurgence that includes explicitly telling you what exactly their deal is.
- If you somehow have managed to avoid getting any Kindred's Seals, you can also trade 10 Login Points each for them.
The Grind Continues
Remember ![]() Sanction for ToAU areas.
Sanction for ToAU areas.
- Bhaflau Thickets - levels 60-65 - Target the Marids at G-8, but again, you're aiming for the Chigoes that spawn when they use weaponskills.
- Again, Valaineral and Semih Lafihna will do the heavy lifting.
- Don't forget the "Conflict: Bhaflau Thickets" RoE objective in the category "Combat (Aht Urhgan)", since you'll be churning through kills rapidly.
- Wajaom Woodlands/Bhaflau Thickets - levels 60-63 - Lesser Colibri can take you all the way to 65, but they slow down a lot near the end.
- Bostaunieux Oubliette - levels 60-65 - Bloodsuckers in the water at the back end (watch out for the higher-level Notorious Monster with the same name but a blue sprite.)
- Labyrinth of Onzozo - levels 60-65 - far north, kill Coeurls and Manticores.
- Escha - Zi'Tah - levels 60-65 - still Weapons, Dhalmels, and Coeurls to the north by portal #2.
Levels 65-70
| Goals: | |
|
|
At level 66, you unlock Limit Break 5, Shattering Stars, which you should probably wait until level 70 to do.
This was an infamous quest back in the day - a one-on-one fight against Maat required a lot of preparation and, for some jobs, lots of consumables.
Not so much these days. With ![]() Rhapsody in Umber, you can summon Trusts during the fight to turn it into a six-on-one. Good job ganging up on an old man.
Rhapsody in Umber, you can summon Trusts during the fight to turn it into a six-on-one. Good job ganging up on an old man.
Getting into the fight requires a Testimony for your specific job. Fight beastmen that have that job until they drop one - there's a list over on the Shattering Stars page.
- Exception: If you're a Thief, you have to Steal the Thief's Testimony from a Thief beastman.
- Exception to the exception: Thief's Testimony does drop from the Tonberry Tracker, which is located in the depths of Den of Rancor and an absolute pain to get to. Just go Steal it somewhere easier.
Then give the Testimony to Maat, tell him that you're ready, let him teleport you to the arena, and win the fight.
If you think Maat's hat is stylish, good news: All you have to do is level the first 15 jobs to 70 and beat him another 14 times and you too can have your own Maat's Cap!
Yet More Leveling
Remember![]() Sanction for ToAU areas.
Sanction for ToAU areas.
- Bhaflau Thickets - levels 65-70 - As above, Marids at G-8, killing the Chigoes which spawn whenever the Marid uses a TP skill. Valaineral and Semih Lafihna continue to carry.
- Bhaflau Thickets - levels 65-70 - Colibri at F-8. They're like Lesser Colibri, but greater. Lot of nostalgia just seeing those doofy beaks. (Feel free to also kill the nearby Crawlers and Trolls if they start giving you grief.)
- Bostaunieux Oubliette - levels 65-68 - Bloodsuckers again, until the experience gets slow and you should move on.
Levels 70-75
| Goals: | ||
|
|
|
Merit Badges
As soon as you reach level 75, talk to the Nomad Moogle next to Maat in Ru'Lude Gardens at (H-5) to receive the ![]() Limit breaker key item and unlock Merit Points.
Limit breaker key item and unlock Merit Points.
Merit points convert each 10,000 experience earned when at level cap into 1 Merit Point, which you can then spend on increasing your skills and attributes and various job-specific benefits.
Personally, my preferred way to do it is keep the setting (under Status → Merit Points → Mode Switch) set to "Experience Points".
That causes you to gain experience points until you hit your level cap, where you'll end 1 short of the next level (39,999/40,000) and automatically earn Merit Points instead of experience - and you'll dynamically switch back to earning experience if you die and lose some or raise your cap later!
You will have to turn in some unspent merit points to complete the next few Limit Break quests.
Specifically, right now you need 3 unspent merit points and 5 Kindred's Seals Limit Break 6, New Worlds Await.
You will need another 19 unspent merit points total for all future Limit Breaks if you want to farm them all at once.
Again, if you don't have enough Kindred's Seals, you can also trade 10 Login Points each for them.
Level 75: This game has content?
You're level 75. Congratulations! If you want to take a break and do some actual content, the game was capped at level 75 for so long that you can do some missions at 75:
- Rank 6 to 10 Missions... are actually not that soloable at 75 with Trusts. As the fights were designed for full parties of humans, they feature lots of enemies. Trust tanks are bad at grabbing and keeping hate on multiple enemies, and your Black Mage Trusts won't properly Sleep the mobs. You can try them, but don't get discouraged if you fail, just come back later.
- Rise of the Zilart is mostly doable at 75. The last few fights are rough, so you may want to come back at 80 or so with better gear. The more difficult version of Divine Might, which you certainly can't solo at 75, rewards you with the Suppanomimi, which melee jobs can comfortably use even at level 99. You may want to come back for that one.
- Chains of Promathia was similarly capped at 75 at the time and should be similarly doable up until the end - and, if you can manage it, also rewards you with the Rajas Ring, which is great for melee jobs until a while after hitting 99. Again, the postscript fight, Apocalypse Nigh, is not doable at 75. And again, don't hesitate to come back if you find it too much of a wall.
- Treasures of Aht Urhgan was 75 cap content as well. The final fight is definitely too difficult at exactly 75 with only Trusts, since it was designed for six humans and it shows, but the rest is doable now.
- Wings of the Goddess came out around the same time they were raising the level cap from 75, so it expects fairly well-geared 75s. You'll want to hold off on doing the latter half of it for now, but completing up to the fight in Mission 14 is more than enough to let you continue progressing through Rhapsodies of Vana'diel.
- Seekers of Adoulin can wait. The fight for Adoulin Mission 2-7-1 expects you to be level 99.
- Abyssea is also post-level 75 content. Sorry.
- You can do A Moogle Kupo d'Etat, A Crystalline Prophecy, and/or A Shantotto Ascension, if you want to. At 75 the final Mission for each storyline presents a battlefield which may be a challenge, even with trusts.
Start One More Clock
Once you hit 75, be sure to talk to a Voidwatch Officer in any starting city!
Voidwatch, like Abyssea, has a real-life timer element to it. You want to start accumulating voidstones every 20 hours sooner rather than later.
Getting to 75
Don't forget ![]() Signet if you're using Zeruhn Mines.
Signet if you're using Zeruhn Mines.
- Zeruhn Mines - levels 70-75 - Everything in sight (Worms, Bats, Crabs, and Leeches). This camp is great, because it has little pockets of enough mobs for at least three people. If you're on Asura, you will likely have company. Check the southeast if both the north and south halves of the "main" room are taken.
- Escha - Zi'Tah - levels 70-75 - the various undead (Corses, Warriors, Sorcerers) and Vultures north of teleport #4 at (H-8)ish. Watch for blood aggro, but also Valaineral can tank like five of these without major issues.
Levels 75-80
| Goals: | ||
|
|
|
Limit Break 7, Expanding Horizons, requires 5 Kindred's Crests and 4 unspent Merit Points.
You will need another 15 unspent merit points total for all future Limit Breaks if you want to farm them all at once.
Like Kindred's Seals, if you don't have enough Kindred's Crests, you can also trade 10 Login Points each for them.
New Armor From Abyssea
At level 78, you can buy armor from Cruor Prospector NPCs in Abyssea.
However, you're new. You probably don't have 18,000 cruor. You could trade 18 Copper Vouchers for 1,000 cruor each, but that's kind of a waste when there are two other relatively easy options:
- If the monthly Abyssea Adventurer Campaign is currently active, the red chest next to Horst and Joachim in Port Jeuno will give you a one-time gift of 100,000 cruor.
- Yell in town. Established players likely have millions of unspent cruor - ever since SE nerfed the vendor sell price of Chocobo Blinkers, the best way to convert cruor into gil, there's not really much to spend it on other than entry into a fight that's been obsoleted by another fight.
Heavy armor jobs get the Perle set.
Light armor jobs get the Aurore set.
Mage jobs get the Teal set.
Catching Up on Rhapsodies
If you didn't beg for help with Siren, once you have that new 78 gear you're good to get that fight done solo.
After Siren, you can progress Rhapsodies of Vana'diel until you complete RoV 2-13 and get two more ![]() Rhapsodies, including Rhapsody in Crimson for your long overdue fifth Trust slot and another +30% experience.
Rhapsodies, including Rhapsody in Crimson for your long overdue fifth Trust slot and another +30% experience.
Leveling in Style
Don't forget ![]() Signet.
Signet.
- Zeruhn Mines - level 75-78 - still Worms, Bats, Crabs, and Leeches.
- Misareaux Coast - level 76-80 - Seaboard Vultures right outside the north exit from Tavnazian Safehold. Slow, but mindless.
- Gusgen Mines - level 78-80 - Worms on the second map at (F-8). It's a bit of a hike.
- Escha - Zi'Tah - level 75-80 - still the undead (Corses, Warriors, Sorcerers) and Vultures north of teleport #4. They slow down a bit near the end.
Levels 80-85
| Goals: | |
|
|
Limit break 8, Beyond the Stars, requires 10 Kindred's Crests and 5 unspent Merit Points.
You will need another 10 unspent merit points total for the next Limit Break if you want to farm them all at once.
You also have to play rock-paper-scissors, because this is when SE decided to make these quests actively waste your time.
Recall that you can trade 10 Login Points each for Kindred's Crests if you don't have enough.
Leveling Spots for Levels 80-85
Don't forget ![]() Sanction for ToAU areas.
Sanction for ToAU areas.
- Mount Zhayolm - level 80-85 - Orichalcumshells south of the Home Point on the beach at (C-9). If you don't have the Home Point, you can use the level 135 Unity warp to get here, and then tag the HP for when you come back.
- Caedarva Mire - level 80-85 - Slough Skua at (F-9) on map 1. They're birds, so they're weak to piercing (Halver and Semih thank you), and the same level as the above Orichalcumshells. Home Point and walk east.
- Maze of Shakhrami - level 80-85 - Warren Bats and Crypterpillars on the east side of map 1 by the Buburimu Peninsula one-way exit at (J-8). From the Survival Guide, go to (G-6), down to map 2, to (I-6), back up to map 1, and and you're there.
- Escha - Zi'Tah - level 80-85 - Goobbues, Wasps, and Snapweeds south of portal #4. Personally, I prefer the crabs.
Levels 85-90
| Goals: | |
|
|
A Crappy Limit Break
Limit Break 9, Dormant Powers Dislodged, is one giant poop joke. I'm not speaking figuratively here. It's literally a joke about the "Brown Mage" from Lower Jeuno helping you poop so hard that you break your level limit.
You will need 1 Kindred's Crest and 10 unspent Merit Points.
Additionally, as you can see on the quest's page, you will have to acquire a random item used for another quest. You will also need literally one Kindred's Crest, but if you don't have that, 10 Login Points handles it.
Leveling Spots for Levels 85-90
Don't forget ![]() Sanction for ToAU areas.
Sanction for ToAU areas.
- Mount Zhayolm - level 85-87 - still the same Orichalcumshells at (C-9). They can only take you so far.
- Caedarva Mire - level 85-87 - the same Slough Skua at (F-9). Still probably faster than Orichalcumshells, still slowing down rapidly.
- Maze of Shakhrami - level 85-88 - still Warren Bats and Crypterpillars. You can watch the experience gained slow down in real time.
- Escha - Zi'Tah - level 85-90 - Goobbues, Wasps, and Snapweeds south of portal #4. This experience slows down too. Wave goodbye to Escha - Zi'Tah! You won't be back here for any more leveling... on this job.
- Vunkerl Inlet (S) - level 87-90 - Duriumshells on the island at (H-7). There are a million of them, they respawn fast, and they're crabs.
- You may have accuracy issues at 87, but your trusts should be fine.
- The Shadowreign version of Signet/Sanction is called
 Sigil, and it gives zero combat benefits for free, so don't bother with it unless you've got Allied Notes to burn as each bonus (Regen, Refresh, Meal Duration, similar to Sanction) requires an additional 50 Allied Notes to add to it per bonus.
- Meriphataud Mountains (S) - level 87-90 - Condors in the southwest corner from (F-9) to (F-11), ish. There's a few clumps. Again, birds, so piercing.
Levels 90-95
| Goals: | |
|
|
The Final Limit Break
The last Limit Break quest, Beyond Infinity, is a Maat-style fight. You will want to have 100 unspent Login Points before starting.
- First, use 10 of them to buy a Seasoning Stone to complete the prerequisite quest, Prelude to Puissance.
- While you're in the Login Points menu, don't forget to check for trusts again if it's a different month than when you started playing.
- For LB10 proper, wait until level 95, then start the quest.
- Use 90 more Login Points to buy three each of Seasoning Stone, Fossilized Fang, and Fossilized Bone, then trade a set of all 3 to Degenhard in Bastok Markets to make two Olde Rarab Tails.
- Enter the fight, summon your Trusts, use the Tail on the Taru, and start attacking.
- Use the second Tail when the first wears off two minutes later, and if it lives long enough, the third when the second wears off. It's not worth the risk of losing to save 30 measly Login Points.
The Last Leveling Spots
For Adoulin regions, you want ![]() Ionis. Ionis is really, really good. It gives +10% experience gain, about 10 attack/accuracy, and a bunch of other little perks.
Ionis. Ionis is really, really good. It gives +10% experience gain, about 10 attack/accuracy, and a bunch of other little perks.
- Vunkerl Inlet (S) - levels 90-92 - you can use these Duriumshells for another few levels if you don't like your accuracy at 90, but Ionis is better enough that you should probably relocate.
- Meriphataud Mountains (S) - levels 90-92 - similarly, these Condors can last a few more levels if you don't like your accuracy at 90, but Ionis is better enough that you shouldn't stay here. That said, there's a non-Ionis option too...
- Fei'Yin - levels '90-94 - Balayang in the four small rooms north and west of Home Point #1. They're bats, so again they're vulnerable to piercing. This is likely faster than the Ionis suggestions at 90, but will drop off much faster because they're level 95-97 mobs instead of 102-104 as below.
- Yahse Hunting Grounds - levels 90-95 - Pinetorum near the beaches at (K-7) to (K-10). You'll miss a lot at level 90, and they put your entire party to sleep frustratingly often, but these fights aren't at all dangerous or difficult and you can sleepwalk (heh) through them all the way to 99.
- Ceizak Battlegrounds - levels 90-95 - Blanched Mandragora near the beaches at (J-8) to (J-10). Same family and level of enemy as Yahse in similar spots, but with a different name and sprite.
- Rala Waterways - levels 90-95 - Depthswalker Crabs and Barnacle Crabs near the entrance from Western Adoulin at (K-8). These tend to go slower than the Mandragoras for the first few levels, especially at 90, but faster later.
Levels 95-99
| Goals: | |
|
|
You're so close! Just grind it out. 99 lets you equip item level 119 stuff and makes everything better.
I Said They Were The Last Leveling Spots
You still want ![]() Ionis.
Ionis.
- Rala Waterways - levels 95-99 - Depthswalker Crabs and Barnacle Crabs near the entrance from Western Adoulin at (K-8). Now that you're 95, these are not nearly as slow as they were at 90. Finish strong, old-school style.
- Yahse Hunting Grounds - levels 95-99 - Pinetorum near the beaches at (K-7) to (K-10). They still put your entire party to sleep frustratingly often.
- Ceizak Battlegrounds - levels 95-99 - Blanched Mandragoras near the beaches at (J-8) to (J-10). These also cast Dream Flower a lot. Just go kill crabs.
I'm Level 99! Now What?
Before you do anything else, go back and talk to that Nomad Moogle next to Maat in Ru'Lude Gardens one last time to get the ![]() job breaker, unlocking the ability to earn Capacity Points and convert them into Job Points for permanent upgrades.
job breaker, unlocking the ability to earn Capacity Points and convert them into Job Points for permanent upgrades.
Other Guides for the Fresh 99
The Endgame Progression Guide is my number one recommendation, not just because I cowrote small parts of it.
There's also the Fresh 99 guide, which is a more detailed look at specifically the "Intermediate" Records of Eminence objectives. That should be the next thing you start doing anyway, so it's a good time to have a detailed guide.
BONUS SECTION: I need help!
I have no gil!
You can cash out up to 99,999 Sparks of Eminence per week at a Records of Eminence NPC into equipment that you can sell to any NPC for about a million gil total. Since every item has the same sparks:gil ratio of around 1:10, the fastest way to do this is purchasing the most expensive item, ![]() Acheron Shields.
Acheron Shields.
To spend exactly 99,999 Sparks, you can buy 36 Acheron Shield, 2 Battle Bow, and 1 poison Cesti.
If you've already used your Sparks for the week, the slightly slower but roughly equally profitable method is to use up to 99,999 Unity Accolades at the similar Unity NPCs to buy ![]() Prize Powder and sell that to any NPC for another million gil total.
Prize Powder and sell that to any NPC for another million gil total.
After that, it's Auction House time. While stacks of ![]() Crystals don't sell for much, they tend to move quickly. Check other items in your inventory as well, but if all else fails, just wait until next Sunday and cash in more Sparks/Accolades.
Crystals don't sell for much, they tend to move quickly. Check other items in your inventory as well, but if all else fails, just wait until next Sunday and cash in more Sparks/Accolades.
What is a "Unity Warp"?
Each of the three starter cities has a Unity Concord NPC, used to join or switch Unity Concords, who also offers other features.
Talking to this NPC and selecting "Bring me to a Wanted Encounter area" gives you options to teleport directly to a broad variety of locations. You can teleport to these places even if you haven't been there yet. It's very convenient.
I don't know what I'm doing!
When in doubt, level up. You can do it pretty easily - this very wiki has a separate guide dedicated entirely to leveling locations, which includes other spots not mentioned in this guide - and it carries obvious and tangible benefits.
But if you really don't know... just go with what feels right. This isn't a job, it's a game. Have fun!
