The Voracious Resurgence | |
| Prime Weapons • Ultimate Weapons • Ultimate Augments • Abjurations iL119 • JSE Necks • Divergence Augments • Escutcheons | |
| Reforged Armor Artifact: +1 • iL109 • iL119/+2/+3 Relic: +1/+2 • iL109 • iL119/+2/+3 Empyrean: +1/+2 • iL109 • iL119/+2/+3 |
Guides • Crafting • Trusts • Apex Monsters |
User:Chizel/Sandbox GobbieRDM

Introduction
The aim of this space is to provide a means for information access for new and aspiring Red Mages, and a place the entirety of the witching community can come together to fine tune our craft. It is not meant to be canonical in nature, nor a shopping list of BiS items, but will introduce players to some of the options and paths available to them. From there, your witchcraft knows no bounds. I would caution you, taking on the role as a Warlock amongst your peers will have you power-crazed and thirsting for more. But if manipulating power is what you desire, you've come to the proper place... right this way, friends.
Under Construction Notes
https://www.bg-wiki.com/ffxi/User_talk:Chizel/Sandbox_GobbieRDM
General Information
"It's the questions we can't answer that teach us the most. They teach us how to think. If you give a man an answer, all he gains is a little fact. But give him a question and he'll look for his own answers." - Patrick Rothfuss, The Wise Man's Fear
Roles & Functions
| Expand |
|---|
Abilities and Traits
Merit & Job Points Progression
Support Jobs
Throughout the Final Fantasy series Red Mage has been referred to as Jack of all trades, and Master of none. I feel that never is that more-so the case than in Final Fantasy XI simply with the amount the main job can do already. Throughout your adventures and career as a practiced Warlock, you will find that several, not a few, Support Jobs will slide your tool-kit in directions toward being Jack of all trades, and Master of a few. The expandable job cards below will talk in more detail about some support job selections and go into what they bring to the table and how they are typically utilized.
Magic Support Jobs
Physical Support Jobs
Specific Use Cases
Progression Overview
I know a lot of what's found hereafter will be basically "shopping list" material for the vast majority of players. However, if you're intent on making the most of your time as a Red Mage in FFXI, be sure to expand some of the notes in each set and read through the provided context and section introductions. Hopefully they'll provide some insight and useful information as you progress as a RDM!
The intent behind the progression sets (i.e. Beginner → Mid-Tier → High-Tier) is to show character/job progression through certain stages or levels of "Content." (Indicated by the "top caption" of each equipment set that falls under those 3 categories.)
Beginner
Post-Rhapsodies of Vana'diel
Players at this level of progress should be close to, if not completely done, with the entire RoV storyline. To be completely honest, this is the real work on Red Mage. A lot of this content will 100% carry over into the next stages of progress.
Some ideal content & gear progression:
- Domain Invasion
You should be intimately familiar with DI by now, hopefully you've acquired the items necessary to flesh out your RDM a bit more, but here's a list of noteworthy items you can focus on:


- Ambuscade Gear
Work towards obtaining the NQ armor sets if you don't have a small group of friends to gather Gallantry with, otherwise use the Ambuscade Chit +1 items to grab the +1 variants of Ambuscade Gear. An alternative path comes with the updates to Ambuscade in the March 10th, 2025 Version Update, in particular the Total Hallmarks cap was dropped to 16,000 from 25,000 and the ability to craft a full +1 set of both the Salvage and Nyzul/Limbus armor variants was implemented. In a huge benefit to new/returning players, 5,600 Total Hallmarks is enough to land an Ambuscade weapon complete to the Kaja stage, and 9,600 is a full weapon shy of meeting the Pulse Weapon requirement.


- Unity Base Items
Level 119~128 mostly, but there'll be one or two items from the 135 tier that you'll want to try and grab early on. Work toward upgrading these to their +1 variants by trading them and 50 of the Unity NM's material items to any of the Unity NPCs in the 3 starting nations at a cost of 10,000 Unity Accolades per weapon, armor piece, or accessory. The sheer number of items to upgrade and the associated cost in Accolades can bite into newer players' means of obtaining quick & easy gil through Sparks & Accolades, so be sure to try and farm up as many of the upgrade materials from the NMs as you can. You will likely get lucky on several of them and obtain the +1 variants right from the coffer. Efforts are doubled during Unity Wanted Campaigns, so be on the lookout for those events. This list is comprehensive but not exhaustive, there are a lot more items you may find yourself wanting as you develop your RDM, and they are noteworthy even if out of the scope of this guide.


- Vagary
The wonderful thing about Vagary is that if you can put together a group of motivated and capable players, you all can set a weekly Content → Vagary RoE objective and earn extra upgrade materials simply for clearing the NMs! Three weekly objectives is likely more than enough to acquire the materials you need for upgrading JSE.
Alternative Battlefields were added that will allow solo players the ability to unlock access to the Empyrean Armor Reforging process. These alternative battlefields come with no additional drops or rewards from the NMs within, so for any upgrade materials like Etched Memories and NM specific upgrade drops you'll either have to spend hard-earned gil or brave the eerie depths of Ra'Kaznar afterall!


- Delve
Like Vagary, this content requires a minimum of 3 people in a party to enter, but there are a number of items and upgrade materials that can be grabbed from doing this content. Additionally, as you do this content you'll be rewarded with Mweya Plasm which can be used to purchase rewards from NMs you have cleared or stored up and used for Rune Fencer and/or Geomancer
 Ergon Weapon forging.


- Reforged JSE
Work on getting your JSE armor sets to their +1 variants.
- BEGIN! Omen
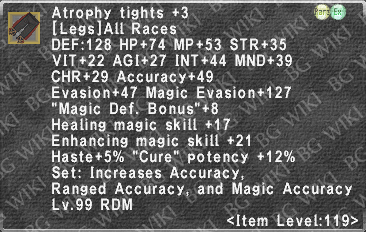
With your Artifact JSE reforged to Item Level 119, maybe even a little bit before then if you have a group to run with, now is the time to start getting to know the ropes in Omen. Upon entry for the first time you gain access to your Atrophy Armor Set +2, and soon thereafter you'll gain access to your +3 Artifact JSE after defeating either 100 foes in Omen or one of the Glassy (Empty) mid-bosses. You'll need a moderately sized pile of
  P. RDM Cards anyway, so get in as often as you can!
- BEGIN! Dynamis - Divergence
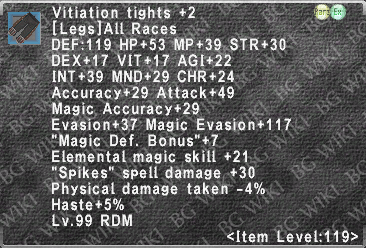
Same goes for having reforged your Relic JSE to Item Level 119, it's a great time to start getting into Dynamis - Divergence or "Dynamis-D" as it's popularly called. You'll often play a pivotal role in Dynamis-D as a RDM with having the longest duration Phalanx available most times, you'll be tasked with sticking with the Tank on your runs and taking care of priority debuffs like Silence on the magic casting foes, Addle on the NIN and BST targets, and Distract on the THFs, MNKs, and DNC foes. If these are your first experiences with this content, do NOT hesitate to ask questions! Any group worth their weight in gold is going to be as informative and helpful to you as possible. GOOD Red Mages are hard to come by! On first entry, you'll gain access to Vitiation Armor Set +2. Like Omen before this, you'll swiftly gain access to your +3 Relic JSE after killing either 100 trash mobs, or the Statue mid-boss looming over Wave 1.
- Special Note on Spending: in no way is this an attempt to redirect how players spend their hard-earned gil, but I feel so very often the advice of the more established players gets washed in a mix of "... just buy X item to be good," and "... save your gil for your AF, Relic, Empyrean upgrades." For me personally, I like to suggest players follow per slot spending limits for the purpose of saving for item progression.
- Try to stick to a 1,000,000 gil/equipment slot limit for this tier of progression. This should give you enough overhead to complete your 119 JSE equipment, pick up a few of the more pricey NQ crafted items, and even throw a little extra Unity augmenting materials at any +1 items you might currently have.
Mid-Tier
Omen/Dynamis Progression
Players should typically be involved with groups that regularly attend Omen and farm both Wave I & Wave II (Divergence) at this stage in their development.
- Ambuscade Gear
By now, you should be working toward or close to finished upgrading your armor sets to their +2 variants.- Continue working on your never-ending list of Ambuscade Capes, hoarding up as many of the cape augmenting materials as you can each month.


- Omen
You should be familiar with this content by now but this stage of progression will focus mainly around completing this content and gearing up for harder challenges yet to come. This content can vary in difficulty from soloable "card/detritus" farming to Caturae NM battles. Teaming up with a group up to ~18 people strong is possible, but not required at all, even for the Caturae NM battles in many cases.


- Vagary
Continue participating in this content. It will always be a fairly decent source of additional income long after you've acquired the upgrade materials you need.
- Delve
Continue participating in this content, as well. Another source of additional income.
- Dynamis - Divergence
You should be somewhat familiar with this content by now. Entry into each zone will gain you access to Relic JSE +2. Defeating 100+ squadron foes in Wave 1 of the corresponding zone, or defeating the Mid-Boss Statue will grant you access to Relic JSE +3.
- BEGIN! Odyssey
- Sheol A, B, C
 Lustreless Scales: Used to
  Augment Level 119~122 Unity Gear.
 Lustreless Hides: Used to Augment Level 125~128 Unity Gear.
 Lustreless Wings: Used to Augment Level 135~145 Unity Gear.
- Sheol: Gaol
Consider starting up or joining a group of players at similar points in progression as yourself. Start tackling some of the Gaol NMs. Even at Vengeance 1 these NMs are not terribly hard with some thoughtful organization and party composition planning. I would not recommend Vengeance 0 at all as the rewards for gaining access to the gear are overshadowed by the ability to "RP" anything gained from Vengeance 1 up to .
.
- Sheol A, B, C
- BEGIN! Sortie
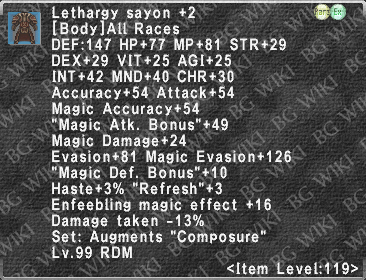
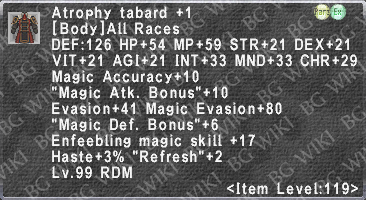
The focus here should be to enter the zone and gain access to your Leth. Armor Set +2. You can just as easily in the same instance get access to your
  Leth. Armor Set +3 by entering one of the basement (E~G zones), which will give you the
  Peerless red mage's soul; H zone is locked out by a rather tough objective to solo, and can even put some groups willing to try on their heels. That one will come later when you're actually doing full blown NM runs with a group. Farming Gallimaufry and Ra'Kaz. Sapphires for upgrading to your
  Leth. Armor Set +1 → Leth. Armor Set +2 are the only current objectives.
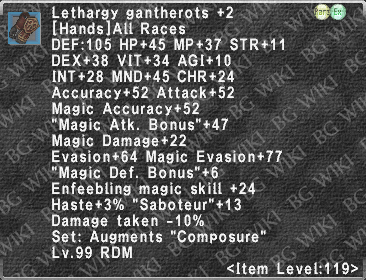
- Reforged JSE
Work on upgrading your JSE to their +2 variants.
- Special Note on Spending:
- Try to stick to a 5,000,000 gil/equipment slot limit for this tier of progression. This should give you enough overhead to complete your 119+2 JSE equipment, perhaps splurge a little on a +1 crafted item here and there, and keep throwing extra Unity augmenting materials at the ever growing number of +1 Unity items starting to clog your inventory.
High-Tier
Sortie/Odyssey Progression
By this stage, you should have a handful of jobs available, and be running with groups that regularly work on Odyssey NM progress and likely even Sortie NM runs.
- Ambuscade
At this point, Ambuscade will primarily be about making gil or gathering currency to build REMA Weapons. Continue spam-buscade at your leisure to facilitate this endeavor.
- NOTE: Not ONE of these weapons are even remotely necessary to play the job efficiently and to high-performing capacity.
- Unity
If you're all caught up on upgrades and most of your augments to this gear, Unity Wanted Campaign is an excellent way to supplement the farming of

 items for your REMA building process.
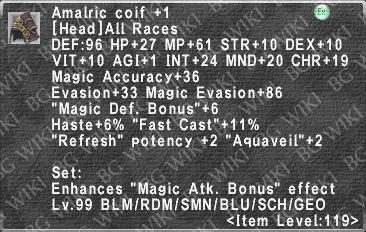
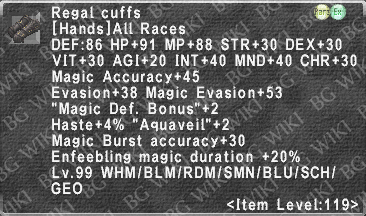
- Omen
Continue with Omen to get ahold of some of the Regal accessories, if you haven't quite gotten everything on the list yet. Otherwise it can be a viable alternative source for gathering Astral Detritus to augment any of your REMA weapons you happen to be building.
- Dynamis Wave III
By now, you and your group should be well versed in the basic mechanics of the game. Enough that you should be able to work your way through and to victory in Dynamis - Divergence: Wave III. This will round out your development when it comes to REMA weapons since it is the single largest source of Astral Detritus in a single sitting. Just remember, less is more when it comes to planning a winning strategy. Too many groups often go in unprepared for the significant jumps in required Accuracy, Magic Accuracy, and just general attentiveness and situational awareness.
_description.png)
_description.png)

_description.png)
_description.png)
- Odyssey
Here's (in my honest opinion) where the real challenge and fun begins. As you progress through Odyssey Vengeance levels, you will find some of the most challenging content that you have ever and likely will ever face in Final Fantasy XI. As such, some absolutely fantastic rewards will come to your RDM. A lot of the following rewards you should have at least some progress on RP-wise or at the very least have acquired them as you worked through Mid-Tier progression:


- Sortie
As you work through Odyssey RP progress, you'll likely get into some Gallimaufry & Ra'Kaz. Starstone farming in Sortie to upgrade the Lethargy Armor Set +2 → Lethargy Armor Set +3
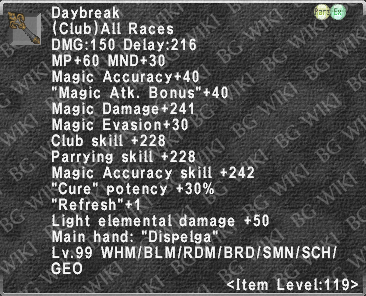
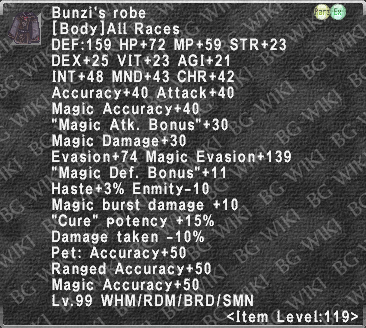
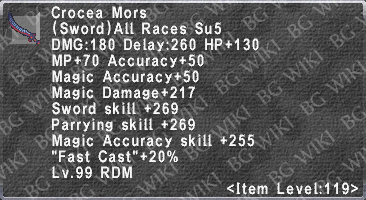
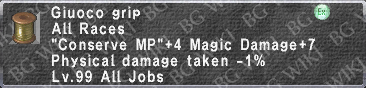
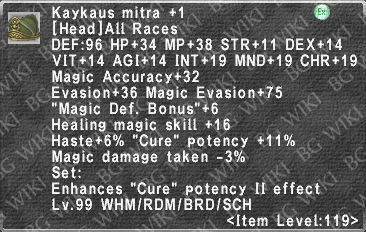
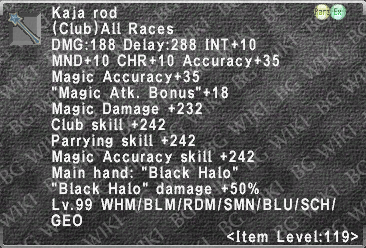
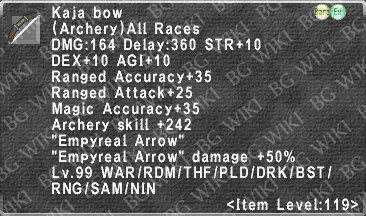
Additionally, the higher and higher your RP accrues on your Odyssey Gear, the more likely you'll be working toward possibly building some of the most powerful Ultimate weapons in the game - the Prime Weapons. Red Mage's options:
_description.png)
_description.png)
- For more information, go here.
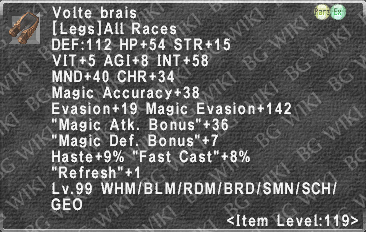
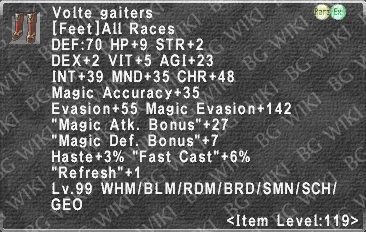
- Reforged JSE
Complete your JSE armor upgrades to their +3 variants. - NOTE: Both Atrophy and Vitiation armor sets will be seeing an update in late Spring/early Summer 2025. Those sets will be evaluated and these progression tiers may be adjusted accordingly when they are released.
- Special Note on Spending:
- Try to stick to a 10,000,000 gil/equipment slot limit for this tier of progression. This should give you enough overhead to complete your 119+3 JSE equipment. At this point, rounding out sets will be all about saving for the higher end +1 crafted items, and still throwing extra Unity augmenting materials at the absolute infestation of +1 Unity items utterly destroying any hope of inventory management you thought you had. Focus your prayers here.
JSE Capes
Ambuscade Capes
Here is an entirely unexhaustive list of some capes that you may need as you play RDM.
| Collapse | |
|---|---|
| Abdhaljs Materials | Notes |
| Hybrid-Enfeeble/Enhancing | |
|
This was one of the first useful capes I ever built in my progress on Red Mage. And it carried me up until just around |
| Cure Potency | |
|
This should be another priority cape early on to boost your curing power as a support class, especially in content where it's less likely you'll be asked to come /NIN. Later on, you'll likely needle this to Enmity -10 from "Cure" Potency +10% as you'll have better and better sources of curing power available. |
| Dual Wield | |
|
I won't pretend melee Red Mage isn't a thing, it very much is. For the enspellers out there, this will get you just that much closer to the Attack Speed cap. Consider a needle for this later on from Accuracy to more DEX. |
| Savage Blade/Knights of Round | |
|
Just your run of the mill STR based Weapon Skill cape! Looks like all other Savage Blade capes, but this one is red. |
| Seraph Blade/Sanguine Blade | |
|
Seraph Blade and Sanguine Blade will become staples of your Red Mage damage kit. While they function differently as magical weapon skills their WSCs are both primarily MND based. Depending on the buffs you have while performing either of these weapon skills, Weapon Skill Damage and Magic Attack Bonus augments could be interchangeable. |
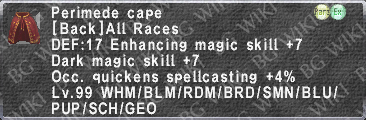
Skirmish Cape
- The
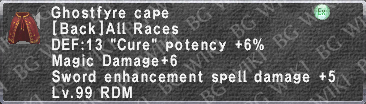
 Ghostfyre Cape is insanely good at one thing, and okay-ish at some others. You'll have this in your Enhancing Magic Duration toolkit until the sun blackens and time fades into nothingness (by the way, that's your tank's Phalanx timer, stop what you're doing and tell 'em to get in their pajamas.) You can obtain this item from Reives located anywhere in Ulbuka including the Wildskeeper Reives. Alternatively, you can also obtain it by trading any combination of 3 other Reive Capes to Makel-Pakel in the Celennia Memorial Library.
- After you've obtained your handy-dandy cape, take it on over to Detrovio, found just inside the staging area of the Inventors' Coalition in Western Adoulin (J-10). There you can start trading him both your Ghostfyre Cape and
 Refractive Crystals you've been saving from spamming Emperor Arthro day in and day out to start augmenting your cape. Ultimately, you're aiming for the following:
- Magic Accuracy +10 (+1~10)
- Enfeebling Magic Skill +10 (+1~10)
- Enhancing Magic Skill +10 (+1~10)
- Enhancing Magic Duration +20% (+1~20%)
- The Enhancing Magic Skill and Enhancing Magic Duration are the kickers here since you'll often be trying to reach for 500 Enhancing Magic Skill in your enhancing sets, any little bit helps. Additionally, the +1~20% Enhancing Duration comes in as a separate duration multiplier to any enhancing spells cast on yourself or other party/alliance members.
Equipment & Knowledge Progression
About Overlays
Special Note on Overlays: Among the equipment sets below, you'll see collapsed overlay sets which are typically just pieces layered over base sets to achieve a desired effect, duration, skill, or defensive parameter. For the sake of completion, a lot of these sets will be filled out completely, but not always. They'll be denoted characteristically as Equipment Set+ for example. These sets are generally Mid-Tier progression or higher. As such, they will contain components that can sometimes seem spread out amongst content-difficulties. These are done this way simply to save space in the guide and are not meant to leave anything out or ignore any alternatives.
Idle Sets
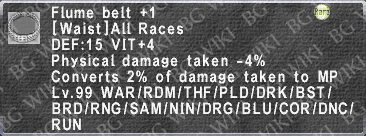
Damage Taken
Sadly, one of the biggest things I see new players skip right past is damage mitigation and new Red Mages are not exempt. The best thing you can do for your own progression and to ensure you and your group's success is set yourself up to be able to survive even the most dire of situations. Damage Taken gear is so prolific in the game now, albeit can be a bit more split between specific damage types early on. Generally speaking, you'll want to aim to protect yourself from hard hitting magic, and the auto-attacks of enemy targets as you get things under control. You're no good to your group if you're silenced or face down in the dirt.
- Early Progression Damage Taken (DT) targets:
- All base Damage Taken categories cap at -50%
- Physical Damage Taken (PDT): this will greatly help you mitigate auto-attack damage from enemies focused on you early on.
- Magical Damage Taken (MDT): starting out, this is probably a bit more difficult to obtain than the above mentioned stat. However, utilizing Shell V (MDT -29%) gives you some room to breath. Shoot for an MDT of -21% to cap this stat.
- Breath Damage Taken (BDT): rarest form of a specific damage taken stat on gear. Luckily, early on, you won't face a terrible amount of this incoming damage. The biggest example in early progression I can think of are the "fetters" you'll encounter in the Lilith high-tier mission battlefield as you work on acquiring pieces of the
 Malignance attire set. Creatures in the dragon family also utilize this type of damage.
- Most, if not all, items with Augmented Magic Damage Taken stats on them will mitigate BDT.
- Most, if not all, items with
- Damage Taken (DT): this stat encompasses all previously mentioned forms of the damage taken stat. Gearing for this stat at the cap of -50% will cap PDT, MDT, and BDT simultaneously, and is more commonly available the further you progress toward "end-game."
- Note on the Malignance attire set: while this is a great DT, Evasion, and Magic Evasion option, it is not a set that is entirely necessary if your intent is to play more of a "backline/support" RDM role. The sets below reflect this.


| ExpandOverlays: Refresh+, Magic Defense+, Physical Defense+ |


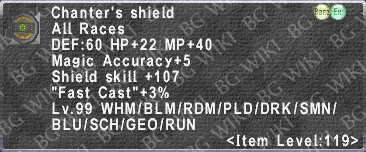
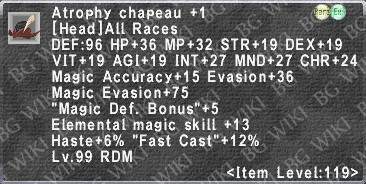
Fast Cast Sets
Fast Cast Trait
"Fast Cast" is, without question, the most noteworthy trait on RDM. Sometimes getting lost in the heaps of Fast Cast gear available to just about every job in the game at this point, RDM absolutely does make the very best use of the trait while also needing the least amount of it when fully Mastered. This makes a TON of room available for great pre-cast options like Magic Evasion and Damage Taken reduction gear.
- A brand new RDM assumed Lv99 with 0
 needs +50 "Fast Cast" to cap, while a fully Mastered RDM requires only +42.
Quick Magic Trait
"Quick Magic", sometimes listed as "Occ. quickens spellcasting" on gear, is not unique to RDM, but Red Mage does make the most significant use of the trait acquired through gear only. Red Mage gains benefits to the use of "Quick Magic" through the ![]() Category: Quick Magic Effect. 20/20 JP in this category gives RDM an automatic 40% reduction in MP cost for spells that are cast under a "Quick Magic" activation. The additional major benefit to a "Quick Magic" activation is that the spell is cast instantly and has an instant recast.
Category: Quick Magic Effect. 20/20 JP in this category gives RDM an automatic 40% reduction in MP cost for spells that are cast under a "Quick Magic" activation. The additional major benefit to a "Quick Magic" activation is that the spell is cast instantly and has an instant recast.
- For gearswap users, this does not affect mid-casts, but like anything in this game, can be affected by server-client response rate. I personally enjoy using this trait on RDM given the major benefits, but everyone is certainly free to make up their own minds.
- "Quick Magic" caps at 10% and noteworthy items available to RDM are:
 Weather. Ring +3%
 Weather. Ring +1 +4%
 Perimede Cape +4%
 Witful Belt +3%
 Impatiens +2%
 Lebeche Ring +2%


Fast Cast Progression
|


| ExpandOverlays: Quick Magic & Alternate Fast Cast Sets |


Healing Magic Sets
Curing spells have some of the most misunderstood (or perhaps misinterpreted) mechanics behind them in the entirety of FFXI. I am definitely not going to go into overbearing detail about what all goes into that. If you want the deep dive, check this out. What I did try to focus on was a number of important curing stats, utilizing Healing Skill sparingly for the Tranquil Heart trait, Damage Taken reduction gear, and progressing Enmity reduction gear along the way.
- Tranquil Heart is multiplicative with Enmity reduction gear and caps at 500 Healing Skill for -25% (e)nmity generation for all Healing Magic.
- e = 100 × (1 - (Enmity Reduction Gear ÷ 100)) × (1 - (((Healing Skill Base + Healing Skill Gear - 250) ÷ 10) ÷ 100))
Admittedly, healing is one of, if not the worst aspect of my knowledge. Much of the information here is fine tuned from conversations with a close friend and one of the best healers in the whole game. Yes, I'm biased. My tendency is to default to stay-alive-while-curing, so I generally go for very defensive cure sets. One of the best things that can be done defensively is practice positioning. Meaning, you want to be able to reach both your DPS players and Tank players with your cures AND be out of range of the enemy's nasty Area of Effect maneuvers if any. This is a joined effort most of the time, meaning groups will have to communicate effectively to achieve desired results.
Cure Set Progression
|


| ExpandOverlays: Weather Cure+, DT Cure+ |


Status Cure Set Progression
|


| ExpandOverlays: Cursna+, Cursna-Received+ |


Enhancing Magic Sets
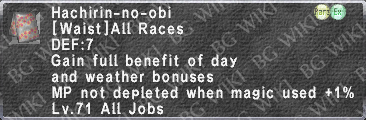
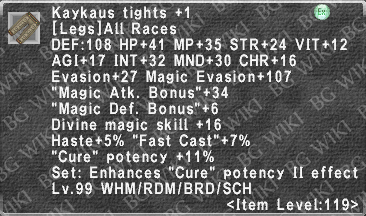
Red Mage has an A rating in Enhancing Magic which is the highest in the game and tied only by Scholar while under the effects of ![]() Light Arts. At 99 a Red Mage should have 8 points into their Enhancing Magic Skill
Light Arts. At 99 a Red Mage should have 8 points into their Enhancing Magic Skill ![]() category which brings them to 420 skill. With no additional gear, a RDM will be at 456 skill when they attain Job Mastery.
category which brings them to 420 skill. With no additional gear, a RDM will be at 456 skill when they attain Job Mastery.
Some spells cast with Enhancing Magic are skill dependent while others are skill capped. Others yet can be free from skill dependency entirely and instead become spells you'll want to try and optimize around their durations, potency, and generally not dying while mid-cast. The sets below should assist you in developing your support class nature on RDM and provide you with plenty of space to grow or prioritize your own needs.
Composure Job Ability Bonus
Composure: The coolest trick in the book for RDM. Verbatim, this ability reads:
- Increases physical accuracy, and lengthens recast time. Enhancement effects gained through white and black magic you cast on yourself last longer. Increases the damage of En-spells for the duration.
- The degree by which your physical accuracy will increase is resolved by:
- ACC = floor( ( (24 × Level) ÷ 74) ÷ 49)
- Provides +26 ACC at Level 50
- Provides +50 ACC at Level 99
- Provides +70 ACC at Level 99 with 20/20 in the Composure Effect category of .
- ACC = floor( ( (24 × Level) ÷ 74) ÷ 49)
- Now, let's talk about calculating self-directed Enhancing Magic. Composure triples the duration of enhancing magic effects cast on yourself, but comes in as a separate multiplier to various gear that has Enh. Mag. Duration +η%.
- Composure duration (cDur) = (Base Spell Duration + JP Enhancing Magic Duration + Gear that increases flat time) × (1 + Duration+η%) × (1 + Duration+η%) × (Composure Duration Multiplier)
- For instance, the Refresh line of spells have a base duration of 150 sec. With 0 and without using any gear that increases the base duration (seconds), we can then multiply the percentage based value of our Enhancing Duration +η% by the Composure multiplier (3).
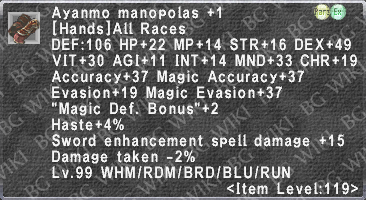
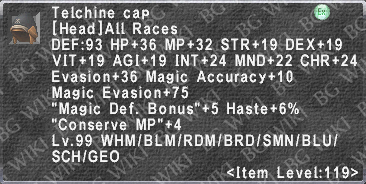
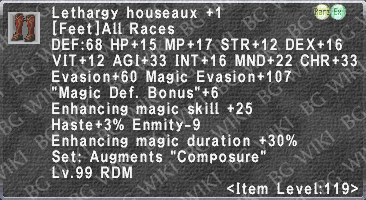
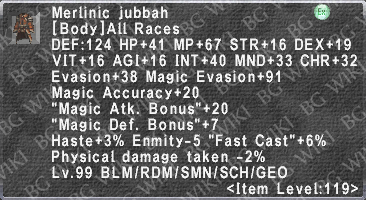
- In this example we'll be using the
 Leth. Houseaux +1 for its Enhancing Magic Duration +30% and the Ghostfyre Cape for its potential Enhancing Magic Duration +20%.
 - (cDur) = 150 (sec) × (1 + 0.30) × (1 + 0.20) × (3.0) = 702 (sec) or 11min 42sec.
- In this example we'll be using the
- For instance, the Refresh line of spells have a base duration of 150 sec. With 0
- Composure duration (cDur) = (Base Spell Duration + JP Enhancing Magic Duration + Gear that increases flat time) × (1 + Duration+η%) × (1 +
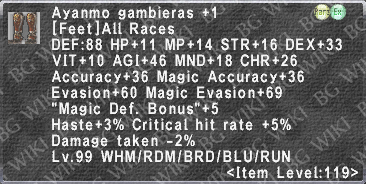
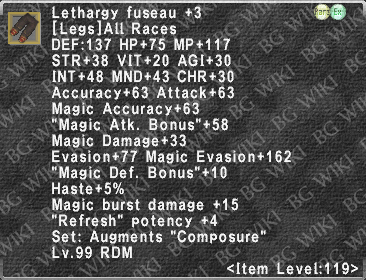
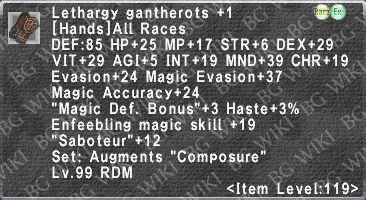
Lethargy Armor Set: Augments Composure Bonus
Additionally, Composure isn't only the coolest trick in the book for RDM, but those you'll be buffing with your Enhancing Magic will love it too! With the Lethargy Armor Set, having Composure active will confer a set bonus to your Enhancing Magic Duration when cast on others. Obviously we'll have to balance sets with necessary skill bonuses for certain spells, like Phalanx II which has an Enhancing Magic Skill component to its potency, or Refresh which utilizes some non-Lethargy pieces for its potency. Sometimes that means giving up one or more pieces from the set to meet that early on and even sometimes later in your progression, but overall it's a fantastic bonus when your tanks and mages glue themselves to your presence knowing they'll get significantly more potent and longer lasting buffs. It also increases the duration of your Enfeebling Magic spells, so just like your party friendos, those monsters are just going to love you to pieces!
- The set bonus takes effect at Estoqueur's Attire Set +2 and up and you can mix & match pieces between this set and any item from the reforged set (Lethargy Armor Set) beyond it. This makes it incredibly easy to find some early Enhancing Magic Duration bonuses when casting buffs on party/alliance members and Enfeebling Magic Duration bonuses for those feisty lil mobbos. From the Lethargy Armor Set description:
- 2 pieces of the set: +10%
- 3 pieces of the set: +20%
- 4 pieces of the set: +35%
- 5 pieces of the set: +50%
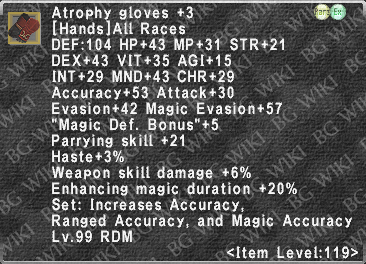
- Note: While it's possible to achieve a +50% duration bonus to your enhancing magic utilizing all 5 pieces of the set, be careful to note that the
 Atrophy Gloves +1 provide an Enhancing Magic Duration bonus of +16% which just barely starts to edge out the 5/5 Lethargy Armor Set bonus. For most of your party buffing, the Atrophy Gloves +1 and up will be prioritized over having a 5/5 set bonus from the Lethargy Armor Set.
- Note: While it's possible to achieve a +50% duration bonus to your enhancing magic utilizing all 5 pieces of the set, be careful to note that the
- Composure duration (cDur) = (Base Spell Duration + JP Enhancing Magic Duration + Gear that increases base duration) × (1 + Duration+η%) × (1 + Duration+η%) × (1 +
 Augments Composure Multiplier)
- In similar fashion to the self-targeted example above, we'll use the Refresh line of spells with a base duration of 150 sec. With 0 and without using any gear that increases the base duration (seconds), we can then multiply the percentage based value of our Enhancing Duration +η% by the Composure Lethargy Armor Set bonus.
- In this case we'll be using the Atrophy Gloves +1 for their Enhancing Magic Duration +16% and the Ghostfyre Cape for its potential Enhancing Magic Duration +20% along with 4/5 of the Lethargy Armor Set for its Enhancing Magic Duration +35% set bonus.
- (cDur) = 150 (sec) × (1 + 0.16) × (1 + 0.20) × (1 + 0.35) = 281 (sec) or 4min 41sec.
- That's not terrible, and it ain't no Koru-Moru nonsense!
- In this case we'll be using the
- In similar fashion to the self-targeted example above, we'll use the Refresh line of spells with a base duration of 150 sec. With 0
Enhancing Magic Set Progression
|


| ExpandOverlays: Duration+, Skill+ |


Composure Buffs on Others
|


Refresh, Aquaveil, Stoneskin, Barspells
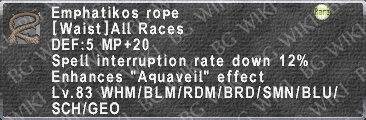
- Aquaveil
- Enhancing Magic Skill ≤ 300 → Prevents 1 Spell Interruption
- 301 ≤ Enhancing Magic Skill ≤ 500 → Prevents 2 Spell Interruptions
- Enhancing Magic Skill ≥ 501 → Prevents 3 Spell Interruptions
- Stoneskin
- Red Mage's Enhancing Magic Skill is high enough even before 99 that they hit the Stoneskin damage cap (350 HP) with zero additional gear. You can literally just throw on the Stoneskin Bonus gear on top of your Fast Cast set and call it a day if you want. I would encourage it, there's no honest reason to stack duration on a buff that is specifically designed to mitigate damage and wear off. Having a faster recast is amazing for those poopy fights that constantly eat your stoneskin. But since we're RDMs, here we go!
- If (Enhancing Magic Skill ÷ 3) + MND ≥ 130 → ᛉ = Enhancing Magic Skill + (3 × MND) - 190
- Barspells
- Bar-elemental spells increase Magic Evasion against specific elementally aligned magic.
- Bar-status spells increase the "Resist!" trait against specific negative status effect magic.
- For Enhancing Magic Skill ≥ 300 → Resistance (R) = 25 + floor(Enhancing Magic Skill ÷ 4)
- Bar-elemental potency caps at R = +150 or Enhancing Magic Skill = 500
- Barspell duration is capped at 480 sec at 240 Enhancing Magic Skill, but your Enhancing Magic Duration bonuses in ,
 , and gear will significantly increase the duration.
  NOTE: While it's easy for RDMs to meet 500 Enhancing Magic Skill there are job specific bonuses & gear for White Mage that really drive up the effectiveness of their barelemental spells. Barspells will overwrite themselves regardless of potency. Please don't be that guy or gal that pops
  Accession as /SCH and overwrites the WHMs barelemental spells.
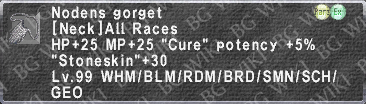
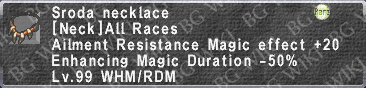
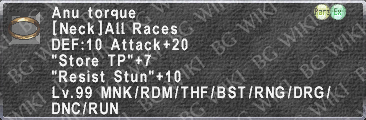
- NOTE: Since AoE barstatus spells have a specific potency of +20, and those of the RDM's Self-Targeting variety have a potency of +30, with the
 Sroda Necklace providing an additional +20 for barstatus spells, RDM holds the highest potency to barstatus effects in the game.

| ExpandOverlays-Self: Refresh, Aquaveil, Stoneskin, Barspells |


| ExpandOverlays-Others: Refresh, Aquaveil, Stoneskin, Barspells |
Phalanx Sets
- Straight from the Phalanx page notes:
- Reduces damage by a set amount (F), Hard cap at 500 Enhancing Magic Skill.
- 0~300 Enhancing Magic Skill: F = Floor(Enhancing Magic Skill ÷ 10) − 2
- 301~500 Enhancing Magic Skill: F = 28 + Floor( (Enhancing Magic Skill - 300.5) ÷ 28.5)
- Notable RDM Phalanx Tiers:
- Enhancing Magic Skill 420 → F = -32
- ≥980 → Enhancing Magic Skill 443 → F = -33
- ≥1805 + Enh. Skill +16 → Enhancing Magic Skill 472 → F = -34
- ≥1805 + Enh. Skill +44 → Enhancing Magic Skill 500 → F = -35
- Reduces damage by a set amount (F), Hard cap at 500 Enhancing Magic Skill.
- "Phalanx" received +η gear directly increases the value of (F) and can exceed the skill-capped value of -35.
- Wearing "Phalanx" received +η gear with a value less than the value currently applied will render a (no effect) error message. So PLDs and RUNs make sure you cancel that buff before getting that sultry phalanx rub-down from your RDMs, or at least put together an idle set. Ahem... this plays into that whole "Communication" thing I talked about early on.
- Enhancing Magic Skill Progression through Job Points:
- 8 /0 Enh. Skill 420
- 80 Enh. Skill 425
- 405 Enh. Skill 433
- 980 Enh. Skill 443
- 1805 Enh. Skill 456
- 8
Phalanx I
|


Phalanx II
- Note: The below sets are also literally your Light Arts/Accession - Phalanx sets. You will want to recast Phalanx II on yourself in phalanx gear for a stronger and slightly longer lasting phalanx.
|

| ExpandOverlays: Dual Wield Phalanx+ |
Enspells
General information about enspells is found in the information following. If you want more specific information regarding them please visit the enspells category page.
The base damage for tier I and tier II Enspells available to Red Mage is based solely on the caster's Enhancing Magic Skill and calculated via the following formulas:
| Enhancing Skill | Formula |
|---|---|
| < 180 | Floor(Enhancing Skill / 9) + 5 |
| > 180 | Floor((Enhancing Skill - 180) / 8) + 25 |
Damage is subject to rounding errors (1024/1000, or about ~2.4% increase in expected damage)
To calculate full Enspell damage, use the following formula:
(((Base Enspell damage + RDM Group 2 Merit Points + RDM Enspell Job Point Gifts + Sword Enhancement Spell Damage +n) × (Composure + Sword Enhancement Spell Damage +n% ![]() )) × (Staff) × (Affinity) × (Resist) × (Resistance Rank Reduction) × (Day & Weather) × (TMDA)) × (Potency Multipliers)
)) × (Staff) × (Affinity) × (Resist) × (Resistance Rank Reduction) × (Day & Weather) × (TMDA)) × (Potency Multipliers)
The base damage of the first tier of Enspells is determined only by the caster's total Enhancing Magic Skill at the time of cast.
- Once the cast has been completed, base Enspell damage remains static for the duration of the effect.
- Any changes in the caster's Enhancing Magic Skill made afterwards will not affect the base damage previously set by the initial cast.
- This allows the caster to change equipment without affecting their base Enspell damage.
- For players that receive an Enspell effect via the Accession job ability, their base Enspell damage is determined by the caster's Enhancing Magic Skill.
The additional effect damage of tier I Enspells is applied to all physical melee strikes of an attack round.
- This property allows tier I Enspell damage to outperform their tier II counterparts when combined with large amounts of triple-attack granted by Temper II.
- This also makes tier I Enspells incompatible with other additional effects such as Sambas.
- Tier I Enspells can overwrite themselves, but cannot overwrite tier II Enspells.
Tier II Enspells follow the same formula as their tier I counterparts to calculate base damage with some major differences in how damage is applied.
- Tier II base Enspell damage is calculated dynamically using the caster's Enhancing Magic Skill during each attack round.
- Each subsequent attack round beyond the first adds one point to a hidden counter that begins when the spell is cast.
- Each point added to this counter modifies base Enspell damage by +1.
- This modification of base Enspell damage will continue in increments of an additional +1 per successful attack round until it has reached a cap equal to double the base Enspell damage based on your current Enhancing Magic Skill.
- The counter will continue to accumulate points during each successful attack round even after base Enspell damage has been doubled.
- This counter is referenced each attack round and will apply towards any changes in base Enspell damage as a result of increasing/decreasing Enhancing Magic Skill during subsequent attack rounds.
- This counter will only reset when the effect wears off or is recast.
|

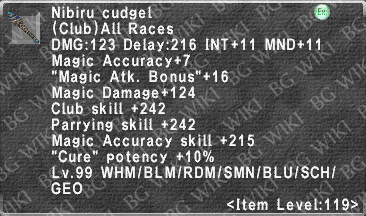
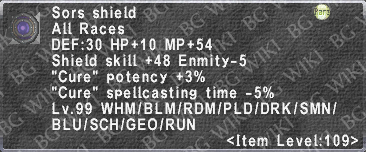
Odin HTBF Weapons
This is not a comprehensive list, but should present a multitude of options outside of the meta Aern/Esikuva/Ceremonial daggers being used. Daggers are ideal for their significantly lower Delay, but not entirely necessary. I've always found this fight to be more enjoyable with others, but being able to Slowlo some of the grindy bits definitely helps progress along.
| ExpandOverlays-Self: Tier I Enspell Engaged Sets |


| ExpandOverlays-Self: Tier II Enspell Engaged Sets |
Enfeebling Magic
Enfeebling magic is used to cripple or hinder your target's abilities to perform various functions against you or your party members. They fall into several categories and subcategories that will have you gearing for Enfeebling Magic accordingly. They are:
- MND stat based enfeebling that will adjust the spell's potency or effect against your target based on a dStat modifier (difference between your MND and the target's MND values.)
- Spells which fall into this category: Slow, Slow II, Paralyze, Paralyze II, and Addle II.
- MND based Magic Accuracy spells which do not depend on a dStat modifier to determine its effect/potency, but instead will better make use of magic accuracy in ensuring the effect lands on your targets.
- Spells which fall into this category: Silence, Distract, Distract II, Addle, Frazzle, and Frazzle II.
- MND based Enfeebling Magic Skill spells which do have a base potency/effect determined by a dStat modifier, but also who's potencies/effects are greatly enhanced by enfeebling magic skill.
- Spells which fall into this category: Frazzle III, and Distract III.
- INT stat based enfeebling that will adjust the spell's potency or effect against your target based on a dStat modifier (difference between your INT and the target's INT values.)
- INT based Magic Accuracy spells which do not depend on a dStat modifier to determine its effect/potency, but instead will better make use of magic accuracy in ensuring the effect lands on your targets.
- Spells which fall into this category: Bind, Gravity, Gravity II, and Break.
- Note: Gravity II is typically desired at the highest possible effect/potency so taking magic accuracy into consideration to a point and layering in the highest possible effect+ is usually the way to go here.
- INT based Enfeebling Magic Skill spells which do have a base potency/effect determined by a dStat modifier, but also who's potencies/effects are greatly enhanced by enfeebling magic skill.
Procedural Note: You may be asking yourself, "Why would I cast lower tier enfeebles in a higher magic accuracy loadout and then switch to potency on the higher tier?" Sometimes you need the target to have slightly lower magic evasion to land a higher potency something else, at the same time, said target has a higher magic evasion than normal to begin with. Rather than casting the same thing over and over with no result, it can be beneficial to just land something lower potency with higher magic accuracy and move to the higher potency enfeeble you desire. Examples like rather than waiting for immunobreak cycles (discussed later) to land Silence, simply landing a high-magic accuracy Frazzle II will be enough to stick a subsequent silence. Other examples include using Frazzle II to land full potency Distract III, or full potency Frazzle III. As with anything, some surface level knowledge of your target as well as the tools available to you will be beneficial in helping you figure out the quickest and most accurate method of applying enfeebling magic on your targets.
Magic Accuracy
Part of accurately and reliably applying enfeebling spells to your targets will depend on your magic accuracy. The below information is pulled from the Magic Accuracy page to illustrate better how this stat is utilized.
There are several components of Magic Accuracy:
- Total relevant magic skill (Enfeebling, Elemental, etc.)
- 1 Skill = 1 Magic Accuracy
- Magic Accuracy for Songs is proportional to the sum of Singing skill and Instrument skill for the equipped instrument type, but it is unclear whether there is a further modifier.
| dSTAT | MAcc | # dSTAT:1 MAcc |
|---|---|---|
| < -70 | -30 | - |
| -70 ~ -30 | -30 ~ -20 | 4 |
| -30 ~ -10 | -20 ~ -10 | 2 |
| -10 ~ +10 | -10 ~ +10 | 1 |
| +10 ~ +30 | +10 ~ +20 | 2 |
| +30 ~ +70 | +20 ~ +30 | 4 |
| ≥ +70 | +30 | - |
- dSTAT : The difference between the caster's and target's relevant base stat.
- dSTAT is a piecewise function which caps at ±30 Magic Accuracy at ±70 dSTAT. Magic Accuracy gains from dSTAT are still subject to the Magic Hit Rate equation.
- The associated stat varies based on the type of magic spell:
- INT in the case of Black Magic
- MND in the case of White Magic
- CHR in the case of Songs.
- AGI in the case of Quick Draw
- Ninjutsu accuracy is not affected by any dSTAT.
- Magic Accuracy Skill from mainhand weapon only
- 1 Magic Accuracy Skill = 1 Magic Accuracy
- Magic Accuracy from equipment, Job Abilities, Atma, Atmacite, etc.
- There is a vast selection of gear options with magic accuracy: a table listing all of them at once would be cumbersome and difficult to navigate.
- Search for Magic Accuracy gear on FFXIAH (search options can be further specified by job, level, etc. using the advanced search options at the top of the page).
In addition to the above categorization of enfeebling spells and consideration of Magic Accuracy, determining the hit rate of such spells also takes into consideration the target's Negative Status Resistance Rank. The following information is included directly from that page to explain the topic in more detail:
Negative Status Resistance Ranks
Monsters use separate negative status resistance ranks for the hit rate calculations and resist states of certain effects inflicted upon them.
- The following status effects rely on these ranks: Amnesia, Bind, Blindness, Charm, Dark based sleep (such as Sleepga), player cast Elegy, Gravity, Light based sleep (such as Repose), Paralysis, Petrification, Poison, Silence, Slow, Stun and Terror.
- These negative status resistance ranks operate independently from elemental resistance ranks and have their own characteristics.
- Example: When the spell Paralyze is cast on a monster, this spell does not refer to the target's Ice elemental resistance rank for hit rate calculations despite Paralyze being an Ice-based spell. There is a separate Paralysis resistance rank that is used instead (this only applies to player to monster interactions).
- While it is common for the negative status ranks of normal monsters to match the element of the spell being cast, there are many instances where this is not the case. This is especially true for countless Notorious Monsters.
- Example: When the spell Paralyze is cast on a monster, this spell does not refer to the target's Ice elemental resistance rank for hit rate calculations despite Paralyze being an Ice-based spell. There is a separate Paralysis resistance rank that is used instead (this only applies to player to monster interactions).
- Monster negative status ranks use the same magic accuracy table as elemental ranks for hit rate calculations.
- For example, a monster with a matching Ice elemental rank and paralysis rank of 60% will require the same amount of magic accuracy to reach the 95% hit rate cap for both ranks.
- At rank 5%, negative status ranks are guaranteed a full resist like elemental ranks.
- Any Enfeebling Magic that lands in conjunction with the job ability Stymie at this rank can bypass this forced resist state, but will only last for half duration.
- At rank 10%, this is where elemental and negative status ranks begin to diverge in behavior. Negative status ranks, like elemental resistance ranks, are capped at a 5% hit rate. However, negative status ranks do not have a guaranteed 1/2 resist at ranks 50% and higher.
- This means that it is still possible to land a full duration spell at ranks 10% and below.
Modifying Negative Status Resistance Ranks
- Negative status resistance ranks can only be lowered by correlating spells that are capable of triggering an Immunobreak.
- Negative status ranks cannot be lowered by the job ability Rayke.
- Performing a Skillchain will not lower a monster's negative status rank. However, performing a Magic Burst with spells that rely on negative status ranks will still grant a Magic Accuracy bonus of +50.
- Spells that lower elemental resistance such as Threnody do not affect the magic accuracy of spells that rely on negative status ranks.
Immunobreak
Immunobreaking is a unique mechanic to enfeebling and a vital aspect of playing RDM. Understanding how it works and being able to apply it in a multitude of different scenarios will serve you very well as you develop your skills playing this job. The information that follows will address some of the key factors of immunobreak and its uses.
An Immunobreak occurs when certain Enfeebling Magic spells are resisted which results in the monster's resistance rank to the negative status effect that triggered it to lower by one rank. This reduction results in the lowering of the monster's magic evasion to subsequent casts of the same negative status effect. Any Immunobreaks triggered afterwards by the same Enfeebling Magic will stack in a cumulative fashion and further lower the monster's negative status resistance rank. This rank will stay at its modified level until the corresponding negative status effect successfully lands.
- Only spells classified as Enfeebling Magic can trigger an Immunobreak.
- The lowering of a monster's resistance rank does not occur with all Enfeebling Magic. Only the following spells are capable of triggering an Immunobreak: Bind, Blind, Blind II, Break, Breakga, Gravity, Gravity II, Paralyze, Paralyze II, Poison, Poison II, Poisonga, Silence, Sleep, Sleep II, Sleepga, Sleepga II, Slow and Slow II.
- This mechanic is beneficial not only to the Enfeebling Magic used to lower the monster's negative status resistance rank, but also to any source capable of applying the same effect such as Blue Magic or certain avatar Blood Pacts despite those spells or abilities not being able to trigger an Immunobreak themselves.
- Example: A player casts Sleep on a monster. The spell is resisted, but an Immunobreak occurs. Not only will the monster's magic evasion be reduced for subsequent casts of Sleep, but spells such as Dream Flower can take advantage of this reduction as well.
- A monster's resistance rank is reset to its original value when a corresponding negative status effect is successfully inflicted upon it. The more times a monster's resistance rank is reset, the more difficult it will progressively become to trigger subsequent Immunobreaks.
- Note that it is the monster's resistance to Immunobreak itself that increases and not its resistance to the negative status effect.
- There is a limit to the number of times a monster's resistance rank can be modified and then reset as a cycle. The number of Immunobreak cycles possible depends on the monster's starting negative status resistance rank. Once this limit is reached, it will no longer be possible to trigger an Immunobreak on the monster for that particular negative status effect.
- One Immunobreak cycle consists of any number of Immunobreaks triggered, the successful landing of the status effect and subsequent reset of the monster's resistance rank to its original value.
- Any corresponding negative status effects that land at the monster's starting resistance rank without any Immunobreaks will not count towards the maximum number of Immunobreak cycles allowed.
- Immunobreaks can only be triggered when the starting negative status resistance rank of a monster is rank 30% or higher.
- If a monster's starting rank is 40% or lower it will not be possible to elicit an Immunobreak.
- During an Immunobreak cycle, negative status resistance ranks may be reduced at most to a rank of 50%.
- If a monster is completely immune to a negative status effect, it will not be possible to trigger an Immunobreak and the chat log will display a "completely resists" message.
The chance for an Immunobreak to occur varies from monster to monster, and can even vary between the different Immunobreakable negative status effects of a single monster. It is possible to increase the chances of one occurring in the following ways:
- Enfeebling Magic skill: The higher your Enfeebling Magic skill is, the higher your chances of triggering an Immunobreak are.
- Resisted Spells: The more times a spell is resisted, the higher the probability of an triggering an Immunobreak.
- Saboteur: this job ability increases the chance of an Immunobreak occurring for Enfeebling Magic spells cast while under its effect.
- Immunobreak Chance Merit Point category: Each merit placed into this Group 2 category will increase your Immunobreak rate by 3% up to a total of 15%.
- Immunobreak Chance equipment augment: The Red Mage relic boots starting with the Duelist's Boots +2 up to the fully upgraded Vitiation Boots +3 are augmented with an additional 1% chance to trigger an Immunobreak per 1 point invested in the Red Mage Group 2 "Immunobreak Chance" merit point category, up to a maximum increase of 5%.
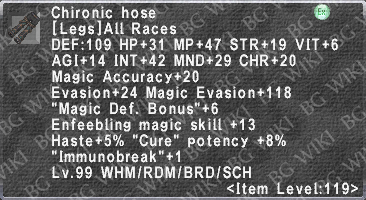
Currently, there is only one piece of armor in the game with the "Immunobreak +1" stat: Chironic Hose
- This stat allows the player to reduce a monster's resistance rank by two ranks per Immunobreak instead of the usual one while equipped.
Potency/Duration Calculations
- Potency = floor( floor(( Base Spell Potency • (Saboteur Potency Bonus +
 Lethargy Saboteur Bonus)) + dStat Modifier ) • (Enfeebling Effect Gear Potency))
- Duration = (( Base Spell Duration • (Saboteur Duration Bonus + Lethargy Saboteur Bonus)) + ( 6 sec • RDM Group 2 Merit Count ) + ( 3s •
 Viti. Chapeau Aug. Bonus ) + Enfeebling JP + Stymie JP ) • (
 Lethargy Set Composure Bonus ) • (1 + Enfeeb. Duration+η%) • (1 + Aug. Enfeeb. Duration+η%)
MND Based Enfeebling Sets
|


INT Based Enfeebling Sets
|
| ExpandOverlays: Potency+, Skill+, Immunobreak+ |


Extra Magic Accuracy
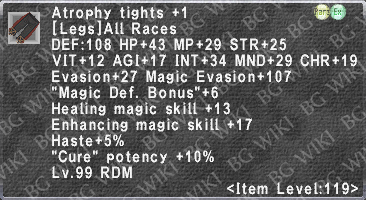
For what it's worth, if you're needing a little bit more Magic Accuracy at the expense of a little dStat modifier (based on the spell), its contribution to overall magic accuracy, a small chunk of enfeebling duration, and/or a bit of enfeebling potency, the following items may assist:
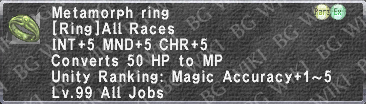
 Null Loop boasting a handsome M.Acc. +50 will grant you (more or less, depending on the tier of JSE neck used) +25 magic accuracy over
  Duelist's Torque +1 with MND/INT -12 and Aug.Enf.Duration -20%
 Null Belt with M.Acc. +30 will give (more or less, depending on your waist option)
- +15 magic accuracy over

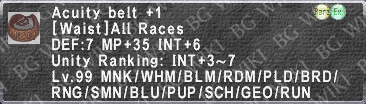
 Acuity Belt +1 with INT -23.
 - +20 magic accuracy over
 Luminary Sash with MND -10.
 - Note: Null Belt will generally be a wash compared to

 Obstinate Sash with Enfeebling Magic Skill adding 1:1 Magic Accuracy to the +15 already on the piece, effectively totaling +30.
- +15 magic accuracy over
 Null Shawl has M.Acc. +50 and competes (more or less, depending on your back option) with:
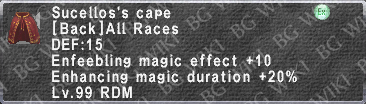
- +0~49 magic accuracy over
 Sucellos's Cape, for a trade-off of: MND/INT -0~30 and enfeebling potency -10 (values will vary depending on augments applied.)
 - +17 magic accuracy over
 Aurist's Cape +1, trading off MND/INT -33.
- +0~49 magic accuracy over
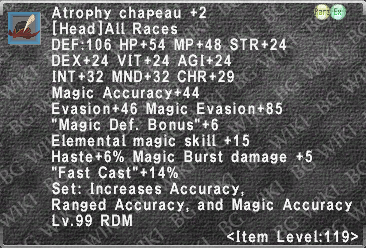
Special Note: As with anything in this game, your situation will vary widely based on live circumstances, the specific content and its difficulty, and the completely unpredictable human element. I wouldn't generally recommend utilizing more than 2 of these pieces in combination at any one time to account for the significant loss of any dStat modifier or magic accuracy components, as well as any resulting changes to needed/desired enfeebling potency. The ![]() Null Masque has been left out of this consideration purely for the fact that the
Null Masque has been left out of this consideration purely for the fact that the ![]() Vitiation Chapeau beyond +1 already carries a comparable amount of magic accuracy when coupled with its enfeebling magic skill as well as its INT/MND attribute.
Vitiation Chapeau beyond +1 already carries a comparable amount of magic accuracy when coupled with its enfeebling magic skill as well as its INT/MND attribute.
Elemental Magic Sets
<Magic Damage talk>
Free Nuke
<progression>
Magic Burst
| ExpandOverlays: Impact, Impact MB, Seidr |
Drain/Aspir Sets
<Aspir Set because drain is lol>
